
A Photography Lesson In Cropping
Today I’d thought I’d give you a photography lesson in cropping photos. I utilize cropping all the time with the photos I use for this blog.
Disclosure:
I’m not a professional photographer. I take photos for this blog, but my methods are mine alone, that I learned over the years.
This morning I drove to a famous Tulsa park. It’s called Woodward Park.
There isn’t very much in the way of colorful foliage there at this time. So I opted to take photos of the flowers.

I took a total of 239 photos at the park today. And I was in heaven.
I’m never happier than when I’m looking through the camera lens and snapping photos. And then sitting down at the computer to edit them gives me joy as well.
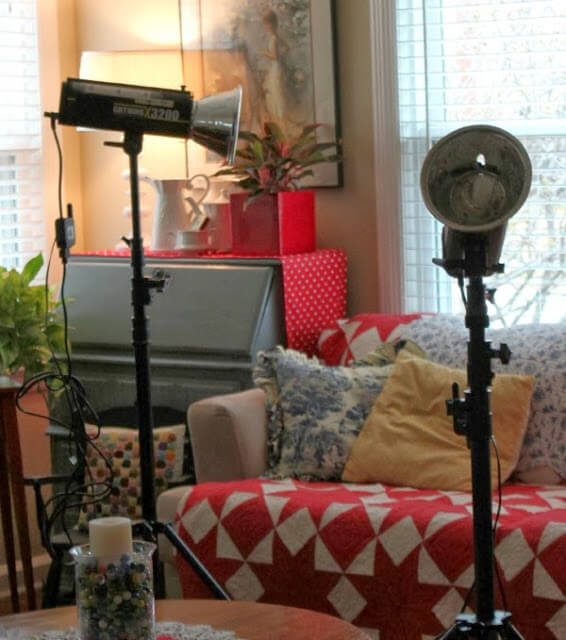
I’m headed to Picmonkey, which is the photo editing site of my choice. I’ve used it for years and am quite comfortable with it.
Outdoor Photos:
When you take photos outdoors, the photos straight from the camera don’t usually need much editing. If you edit at all.

The photo above is a nice photo as is. It has lots of texture. The sun shining through the flower petals gives it interest.

After I cropped the above photo, it is only slightly different. It didn’t need much to be what I consider a good clear photo.
A photo is oftentimes over 3000 pixels when it is taken. That many pixels means that it takes a lot of time to load on a blog.
I like to resize my photos so it doesn’t take someone forever to load on my site. If it takes too long to load, they might leave and not come back!
Cropping Photos:
The cropping of photos is particularly important when taking photos of birds way up in the tree branches.

I cropped the photo of the woodpecker on a tree branch above. But it didn’t remain clear.
So I should have just left it alone and resized it.

I’ll delete the cropped version of the woodpecker.
Cropping Photos Of Flowers:
I love to take photos of flowers. First, they are usually still unless the wind is blowing. Therefore the photo is not blurry.
In that case, it is only the photographer that can make a difference and not the camera or the subject.

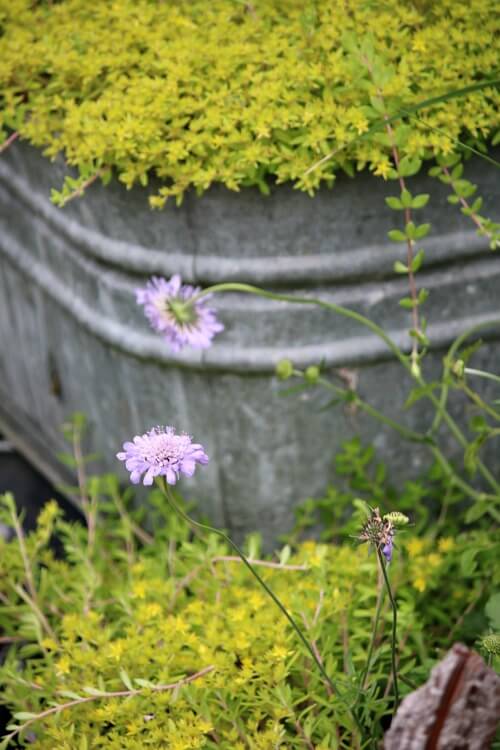
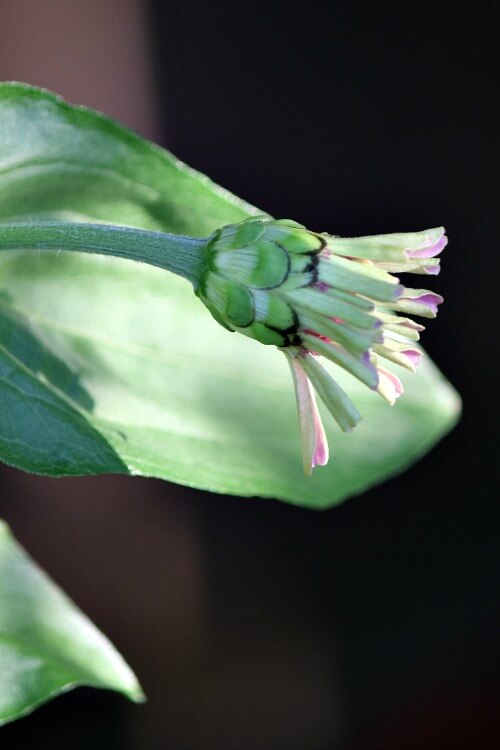
With this beautiful pink flower, I chose to crop part of the petals from the photo.

I tweaked the contrast just a little bit.
Use Photo Editing To Improve Your Photos:
Utilize your photo editing site to make your photos better. Sharpen, add clarity, lighten or darken the photo.
It can make a big difference, especially if you take a photo in a low light situation.
Sometimes the only way you can see what’s there is to lighten it.
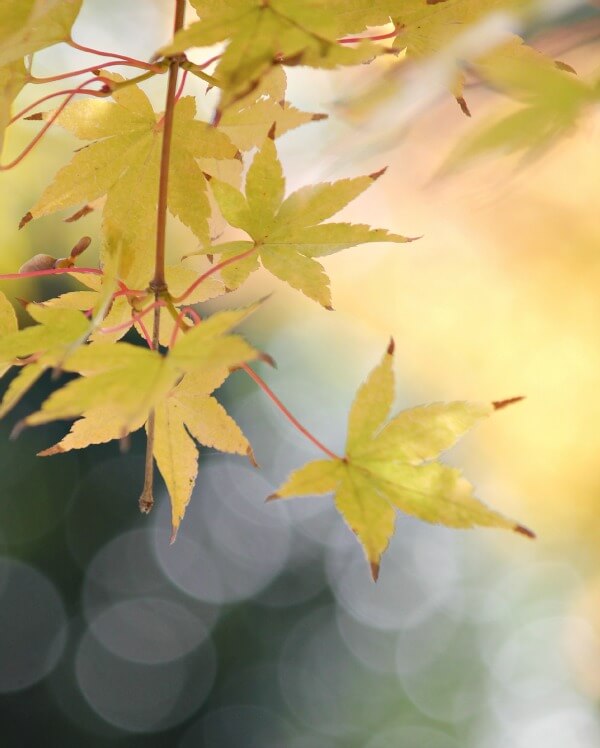
What Is Bokeh:
The photo below is clear, with bokeh in the background. I can’t tell if there will be bokeh until I see it on the computer screen to edit.
Bokeh is defined as “the effect of a soft out-of-focus background that you get when shooting a subject, using a fast lens, at the widest aperture, such as f/2.8 or wider.”
Simply put, bokeh is the pleasing or aesthetic quality of out-of-focus blur in a photograph.
It is pronounced “BOH-kə or BOH-kay“

To get a close up of the flower, I ended up cropping off most of the bokeh. But this bokeh didn’t appear particularly pleasing anyway.

Focus & Get A Clear Impression:

The only thing the photo above got right is that it;s a clear photo. I’ll need to crop it to make the flowers more pronounced.

And so I cropped it.
The flowers are now much clearer and more prominent in the photo. Otherwise the flowers might have almost disappeared into the foliage.

The orange daisy above is what I consider a decent photo. There isn’t all that much I can do to improve on Mother Nature’s art.

I cropped it. But in this case I think I like it before it was cropped much better.
So in this case, cropping was not necessary and gave little to the finished product of the photo.
Cropping To Get More Photos:
Sometimes I will start out with one photo omy photo editing site. And when I’m finished cropping it, I will end up with 3 photos.
I’ll crop in one direction, then possibly the other. I will zoom in on the photo, and then I might cut part of the photo off.
If you resize your photo, make sure you save the original size so you can go back and play with it again.
Always keep the original somewhere in a file on your computer.
A picture is worth a thousand words, as they say. And sometimes it can look like a thousand bucks.
Gorgeous photos, Brenda!
You are such a wonderful artist with your camera. Your beautiful photos belong in magazines…
You are such a wonderful artist with your camera. Your beautiful photos belong in magazines…
What a wonderfully explained lesson! Thanks!
What gorgeous photos, Brenda, and fabulous tips!!! You're just so smart and talented – we're lucky to have you share your wisdom with us!! Big hugs!!
It's thanks to you for telling me how to do this when I came back to blogging or my pictures would still look horrid 🙂
xo,
rue
Wow Brenda, what a dramatic difference just by cropping! Thanks for this photography lesson today. LOVE PicMonkey!
My digital photos are a mess. I need a tutorial 101 on how to organize them! Thanks for the information. Your photos are amazing.
I have my photos on my Desk Top only. I upload them there by month and year. That makes it easier to go back and find what I need. I truly believe the number one way to excel at photography is the same as it is for writing: the more you do it, the better you get at it.
Brenda,
Thank you for the tutorial. I need to check how long it takes for my blog to load and work on sizing my photos. Great job!
Judith
Gorgeous photos. xoox Su
Great ideas. Thanks.
Brenda,
This was lovely and educational, you did a great job of combining both- a true educator at heart, I think.
Well, I would personally enjoy seeing more of your tutorials on photography, you know I did mention to you that you had a talent and you do.
I just recently took an online photography course which I enjoyed too-we all want to learn more on the secrets to a good photo.
I am so glad that you enjoyed yourself too and I enjoyed your photos!
xo
Jemma
I had to smile when you said how happy you are as you have a load of photos to edit. I feel the same and would be lost without my picmonkey royale or photoscape. I love the clone tools, cropping, highligting etc. and always edit size for quick loading on the blog and my etsy shoppe. So many don't realize you can enlarge your photos when placing it in a post. It's fun to do and makes such a difference. Thanks for sharing. Great pics. cm
I used to use Photoscape quite a bit, but with all the great things they've added to Picmonkey, I just use that now. The number one thing I see in new blogs is small photos. This is eye candy and needs to be large.
Love the pictures Brenda…Thanks for showing us the flowers there…
Thanks for sharing i like all the photos they look great have a great evening, with love janice
I wonder if this can be done in Picasa editing. I need to really do something because I think my pics are too many pixels, thus too much load time. When I export them as smaller pixels in Picasa they end up fuzzy on the blog.
I will try pic monkey Brenda.
ok…just fyi, if you use picasa will let you reduce the pixel size. Then you export it to the folder of your choice. I will try this for my pics Brenda as I am afraid my pics take too long to load. Sheila
It's important that your blog doesn't take too much time to load. You can go to Pingdom Tools and see how long it takes to load.
Thanks, Brenda! I like the hint about how to blur the background!
You did a great job of explaining this, Brenda!
This is always so confusing to me! Is the pixels # how you get the pictures to all be the same size?
No, not necessarily. I could size mine at 600 pixels, then add them to a post and hit X-Large, and they'd look different than if I hit Large. The pixels are the many, many units, let's say, that make up a photo. But coming straight out of the camera, it's usually over 3000, as I wrote above. And that's way too many for our needs. Because the more pixels, the longer it takes to load the blog.
Lots of great hints, Brenda! I love photo editing, too. I always resize my photos, but did not know the original size trick. I will have to try that! Thank you! Beautiful photos, Brenda!
I didn't know that for a long time. I used to size mine on Blogger at X-Large. But if you do Original, they will be exactly the same size all the way down your blog. And I like that uniform look.
I always say crop till you drop! You love pictures so much, you really would love instagram. If I can do it, you can do it. It is addicting. They have some amazing filters!
I just can't afford the type of phone you have to use. Much less an extra internet charge.
So enjoyed your pics. I try, but my hands shake so I am lucky if my pictures have heads on the people. I don't know how to do all of those neat things that you do, so thank you for sharing your photos with all of us. Blessings, Carolyn in Florida
Have you tried leaning up against something, or sitting down. Sometimes I do that. I might lean up against a tree or the wall. You could get a tripod. But I like to go out and take photos and wouldn't want to haul it around.
All the flowers are done here so these were fun to see and every single photo is gorgeous ! 🙂
Your photos always look great, Brenda. Can I ask why you don't watermark your photos though? xo Diana
I just never really saw the point. If someone wants it bad enough, I've heard they can probably take it off with Photoshop. And I just plain don't like to obscure anything in my photo with a watermark. I just hate it when someone puts the watermark in a very noticeable spot. Ruins the photo for me. Guess I'm a purist in the regard!
That's exactly why I don't do it. If someone wants my silly pictures bad enough, they'll figure out how to do it regardless if I have a watermark. Besides, I don't think enough of my own photography to worry about it lol
Beautiful photos! Thanks for the tips! How did you focus on one "subject" in the photo to make the background blurry? Love these! Was that done with your camera (on what setting), or with picmonkey? ~Rhonda
It was done with my camera. For years I've had a Canon Digital Rebel. Probably 7 years old now. What you do is this: Hold down the button enough to focus. Move this way and that. When you move, it will automatically change what it is focusing on, thus changing what blurs out. That's how you get a different blurry effect on different things. I always just use Standard Mode and never use flash. I'm to lazy to learn manual!
I remember depth of field from a photography class I took many years ago at the Southwest Craft Center in San Antonio, TX. We actually used film! And chemicals to develop it! Such good memories of a wonderful experience…..
Great post. Your pics always look fabulous.
This is a great tutorial Brenda! I always have to remind myself to take a wider shot rather than zooming in because I like just to zoom in on something when I'm photographing it. And when you zoom in on a photo you can't crop it, lol
Depends. Even when you zoom in, straight out of the camera it's probably going to be over 3000 pixels. So you could crop part of a flower. Or part of the scenery, etc. As long as you've got that many pixels to start out with, you can pretty much do what you want.
Then after I crop and save that pic, while still in Picmonkey, I hit the arrow that makes it go backwards. Then I look at Resize and if I'm back to the original size, say 2500-3000, then I can start cropping all over again.
Thank you for the tips. I love to learn new photography techniques.
Joyously,
Betty