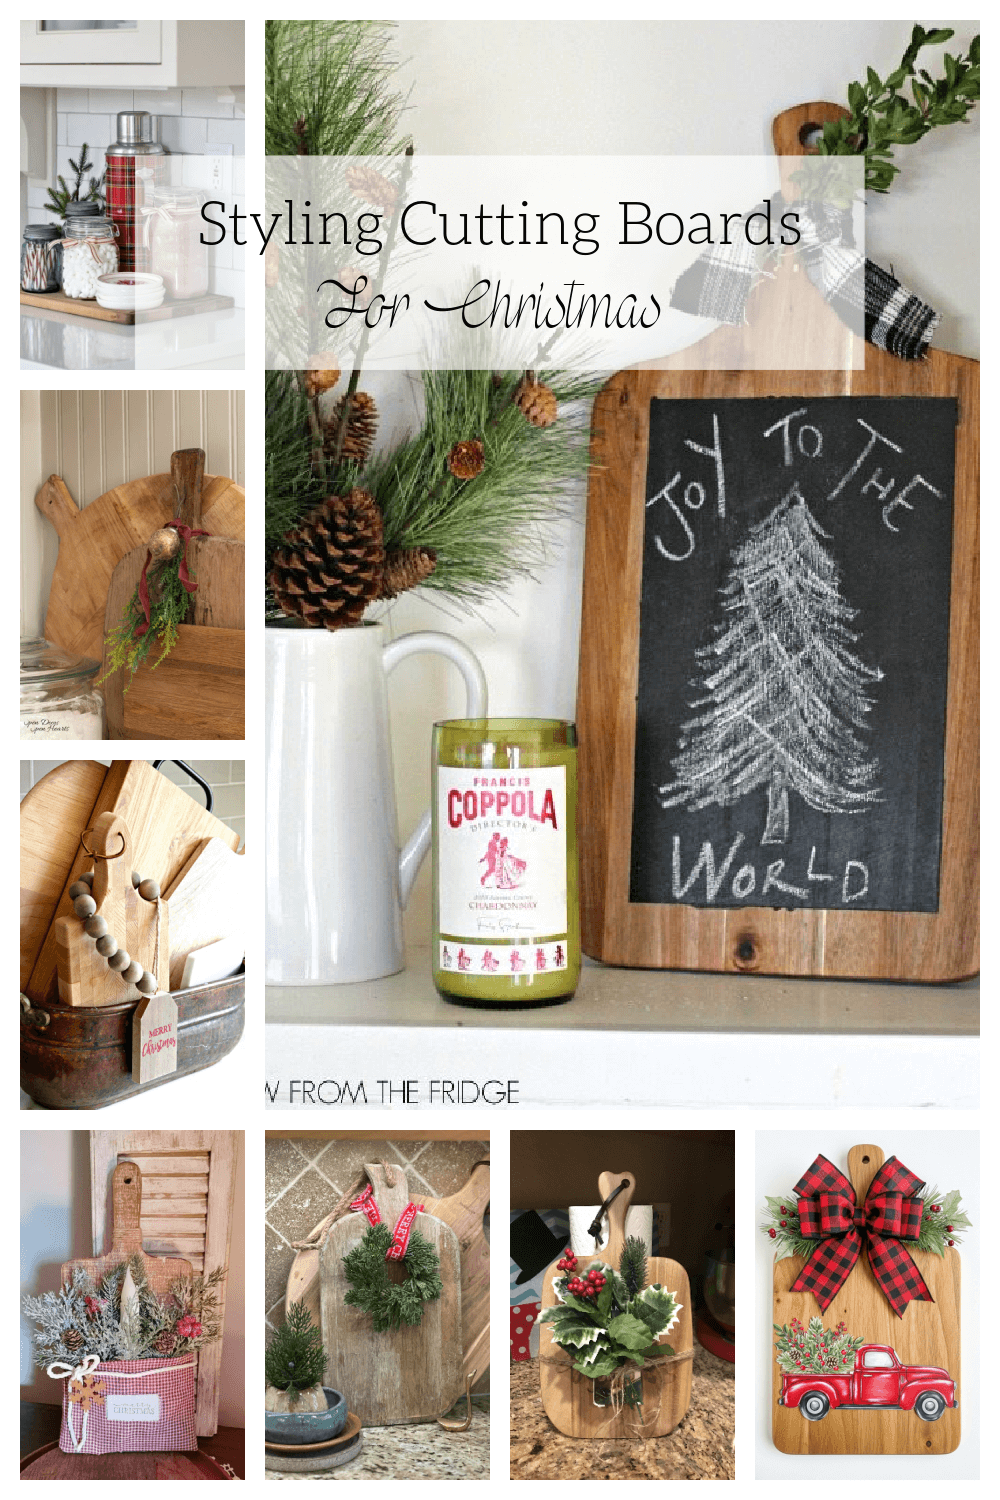
Cutting Board Displays & Christmas Projects
This post may contain affiliate links. If you purchase through links on my site, I may earn a commission at no cost to you. For more information, please see my disclosure policy.
Today I’ve found cutting board displays and Christmas projects to share with you.
I love viewing styled cutting board projects anytime, especially at Christmastime. I’ve collected photos of projects I found on Pinterest and Google. Plus, I created a collage showcasing how I’ve decorated with cutting boards over the years.
Cutting boards are among the most frequently used items in any kitchen, and over time, they can become scratched, stained, or simply outdated. Instead of tossing them in the trash, why not transform and upcycle cutting boards into something new and beautiful?
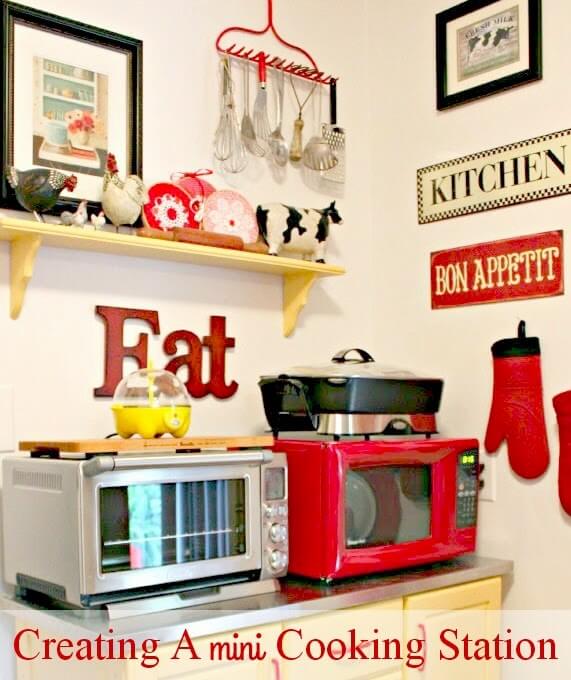
How I’ve Styled Cutting Boards in My Home:
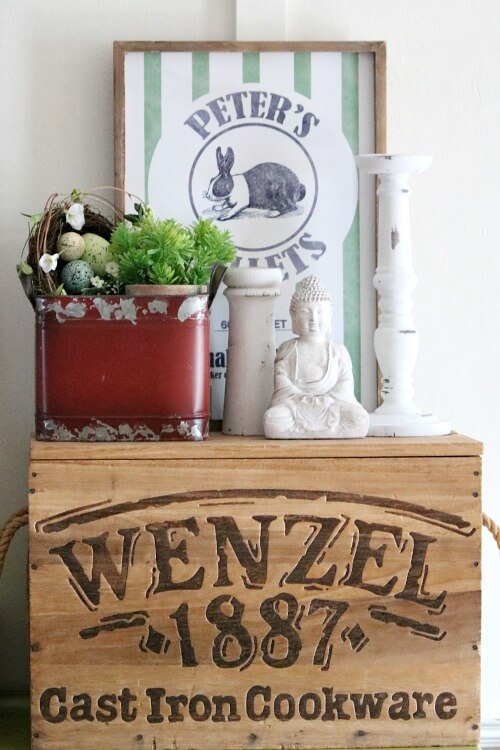
Here’s how I’ve styled cutting boards, setting them along countertops and arranging them into vignettes. Some I gathered and stored in wooden boxes.

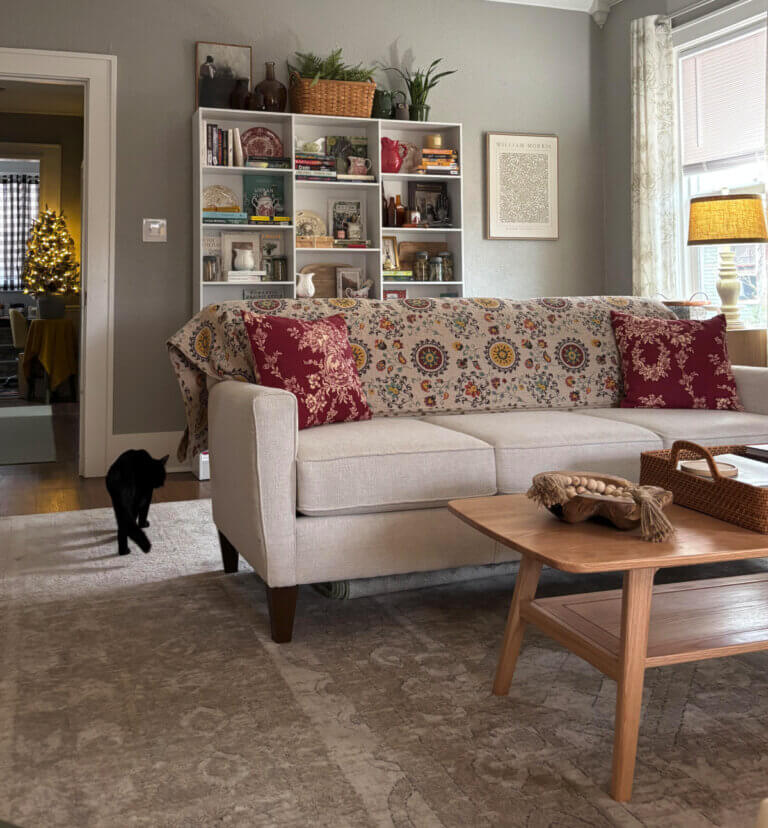
Cutting boards aren’t just for kitchens. I’ve used them in dining rooms and living rooms when decorating. You can get inventive and use them anywhere. I think cutting boards are also fun to use as a base for other decorative objects.
Styling Cutting Boards for Christmas:
It’s also fun to decorate and style cutting boards at Christmastime.
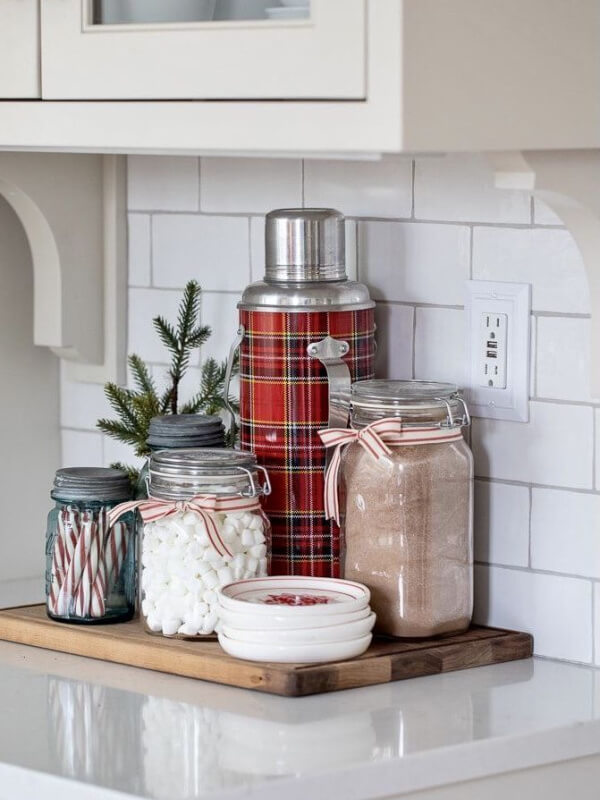
Cutting Board Base for Cocoa Station
The hot chocolate station styled for Christmas, shown below, was one I found on Pinterest, with no image source listed.
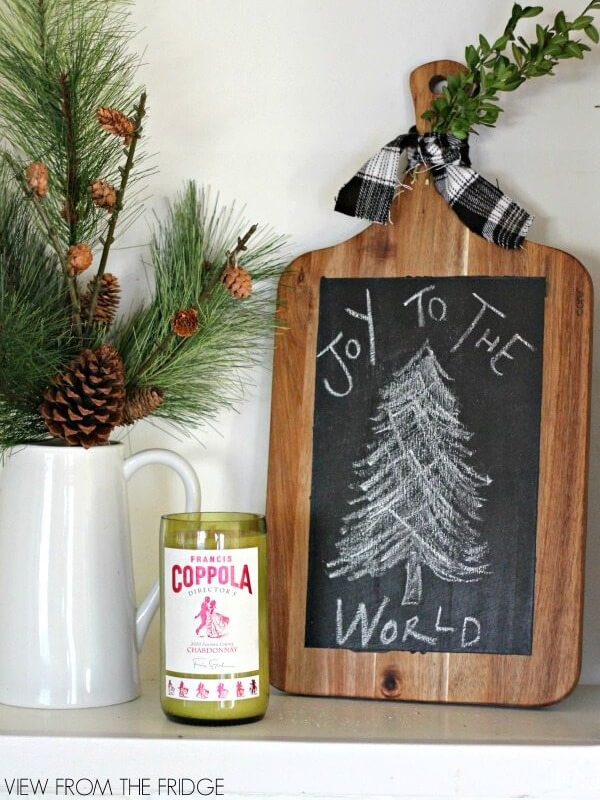
Cutting Board Project with Chalkboard Surface
The second picture above shows a cutting board with a chalkboard surface and the words “Joy To The World.” It was created by the blogger behind Juggling Act Mama.
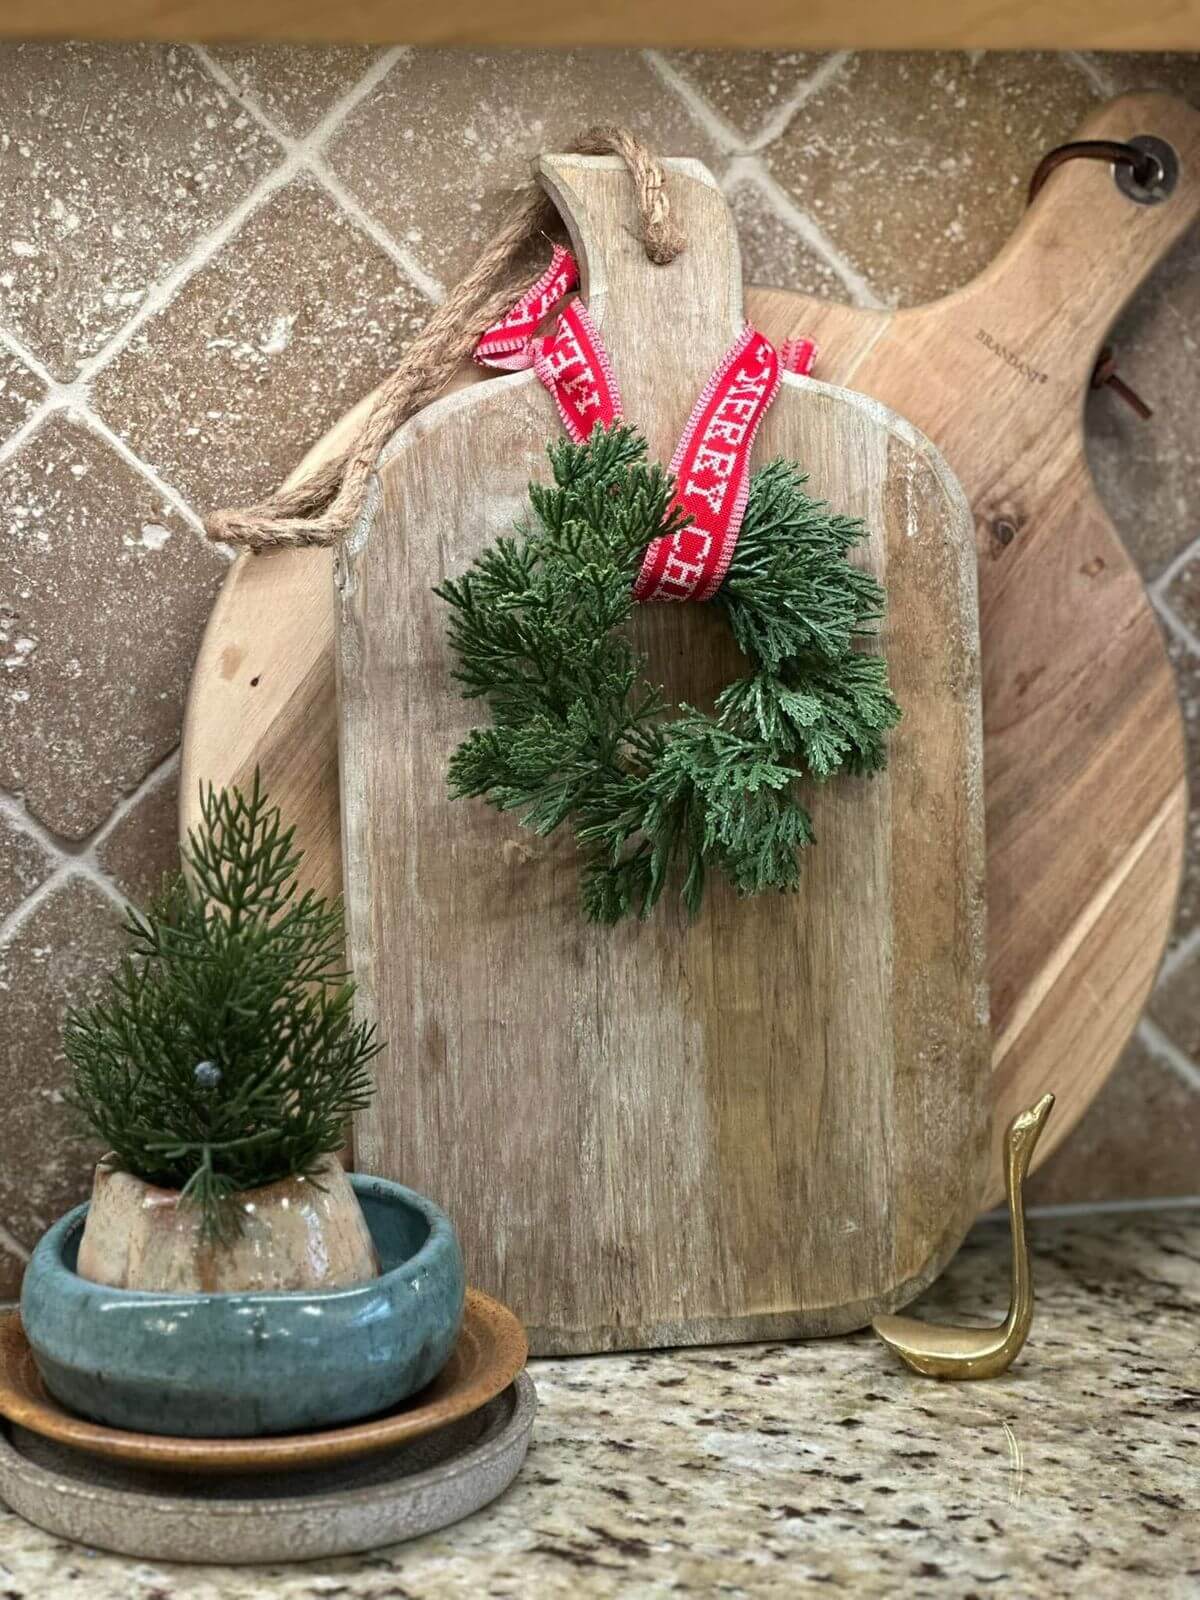
Below are cutting boards leaning against the backsplash and decorated with small Christmas wreaths and decorative ribbon. That display was found on Pinterest with no image source listed, but it appears to be easy to create.
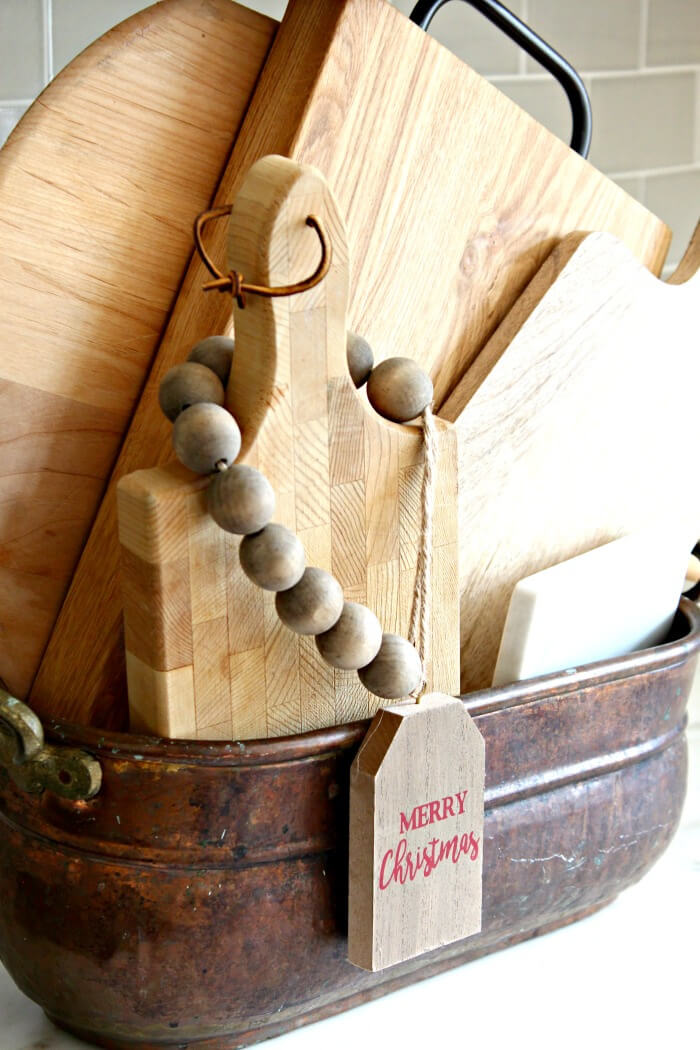
Cutting Boards Arranged in a Container
Gather various cutting boards and place them in a copper container like the one below. Then create a boho-style sign with wooden beads to herald the season. Southern State of Mind created this display.

Layered Holiday Cutting Board Display
Next to that are cutting boards leaning against the backsplash. The middle cutting board is decorated with Christmas greenery and a gold ornament, and is tied with a fabric ribbon. Open Doors Open Hearts styled that one.
Cutting Board Decorated with Christmas Greenery
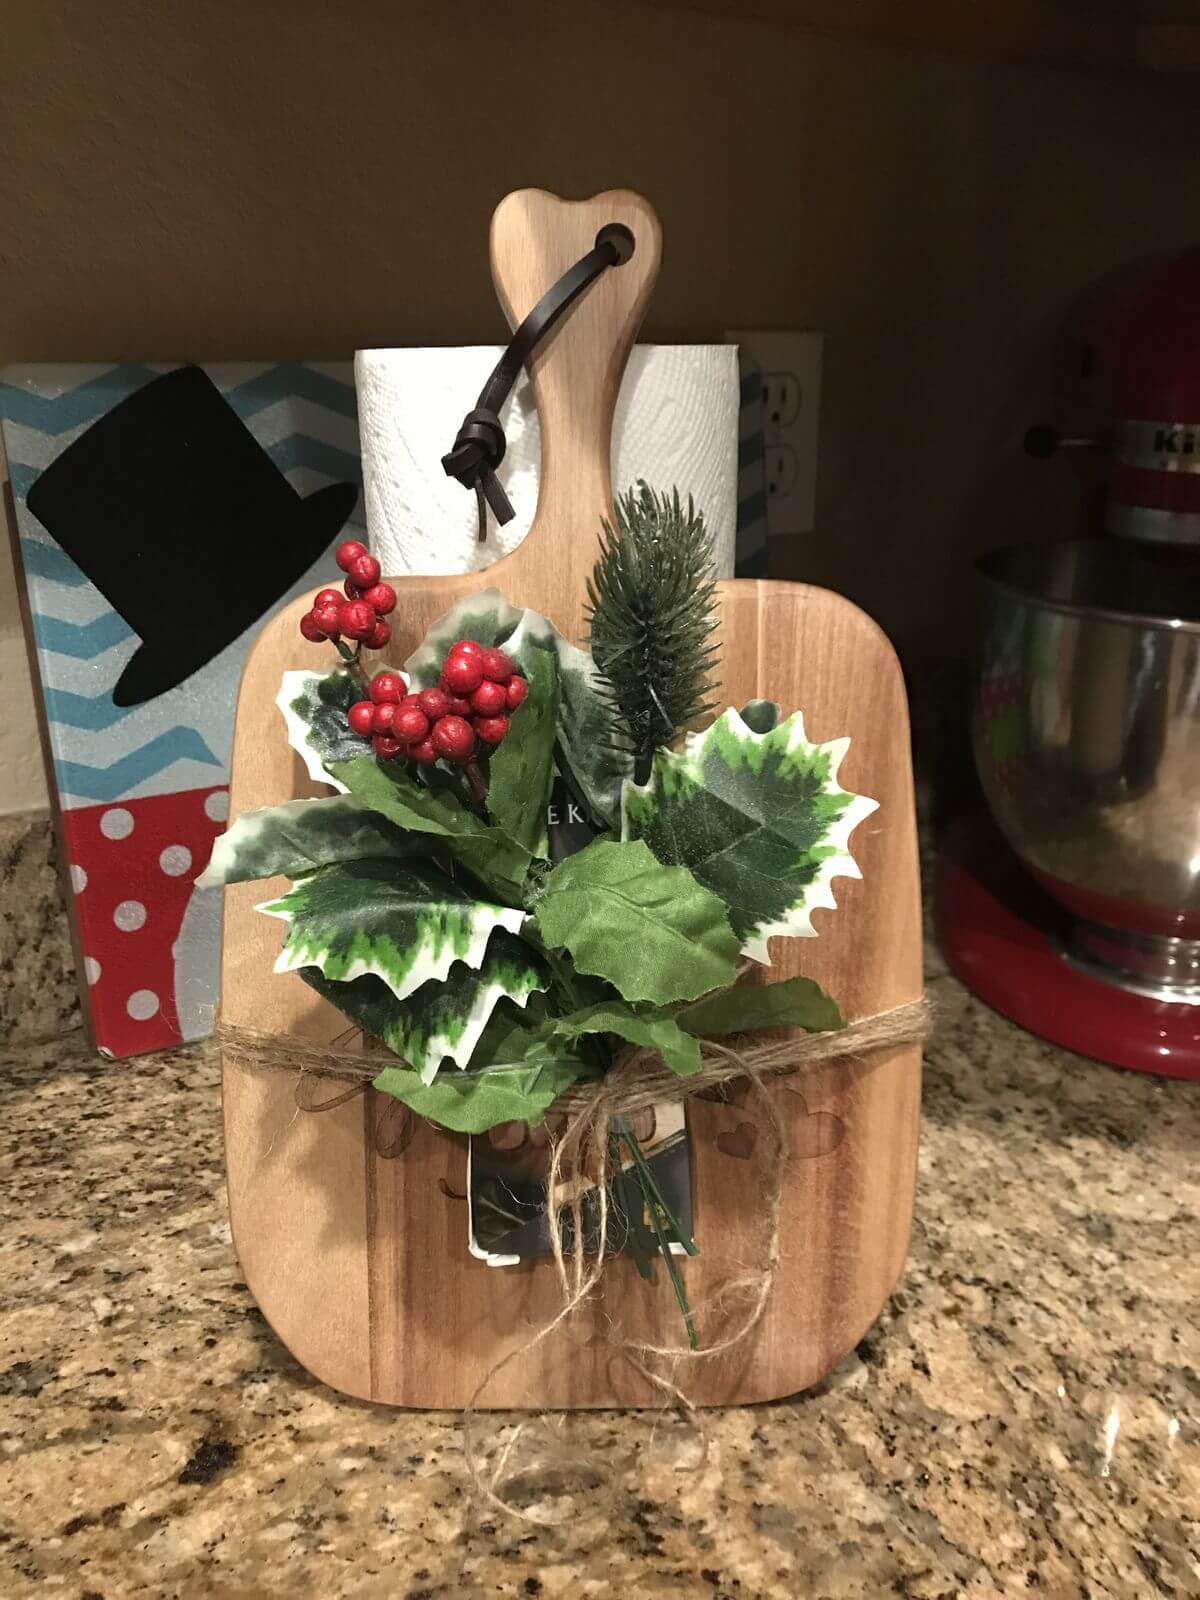
This Christmas cutting board project is easy to replicate with holiday greenery, red berries, ribbon, and jute. It was found on Pinterest, but didn’t include the image source. Lean it against the backsplash or hang it vertically.
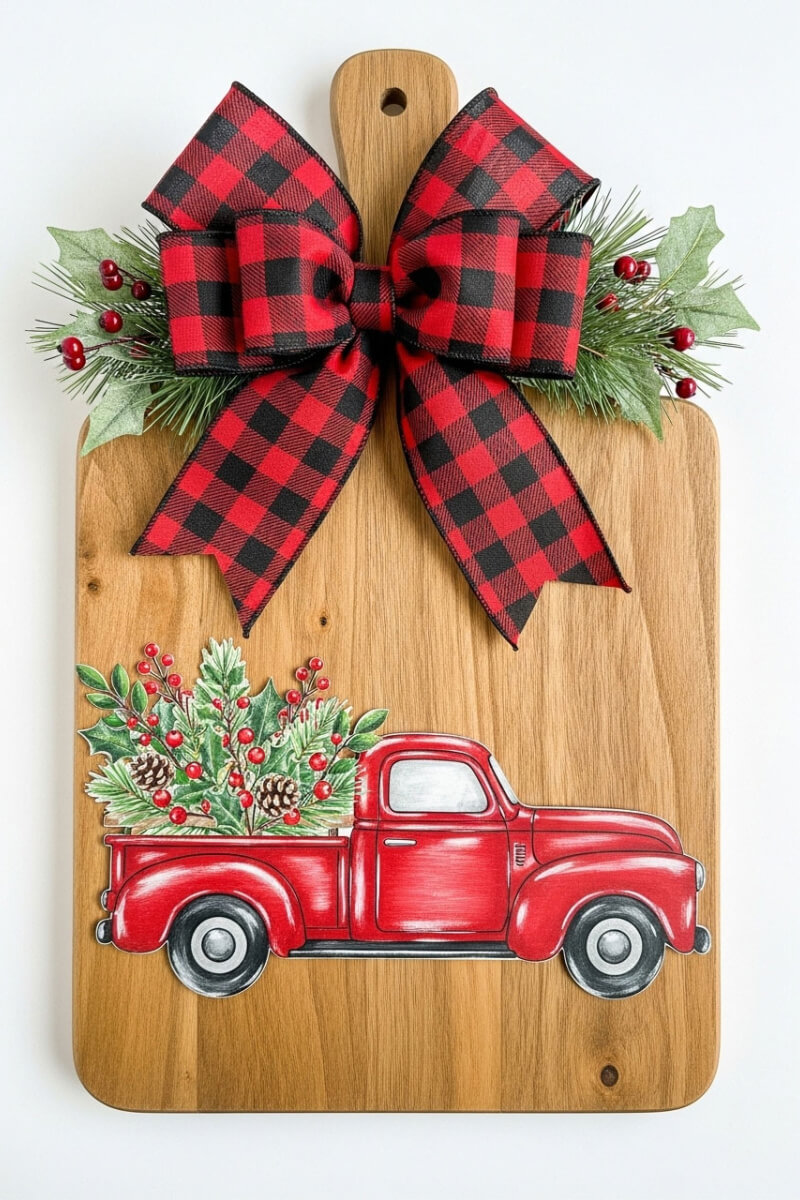
Vintage Red Truck Cutting Board Project
Play Party Game created the holiday project below. It features a vintage red truck, greenery, and a red-and-black plaid bow.
For this project, the website says you would need:
- 1 Dollar Tree cutting board
- Christmas-themed napkins or scrapbook paper (look for vintage red trucks)
- Mod Podge (matte or glossy finish)
- Foam brush
- Faux berries and greenery
- Red or buffalo plaid ribbon
- Hot glue gun and glue sticks
Follow this link to Play Party Game for instructions.
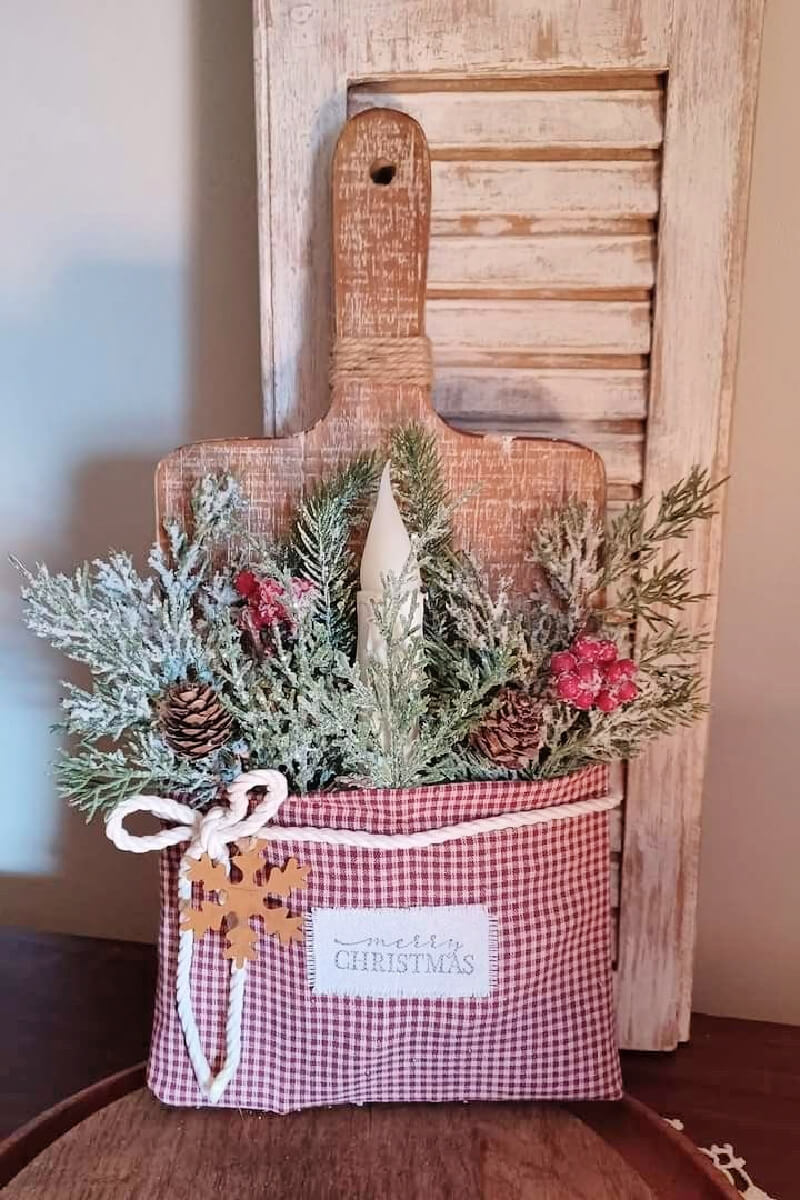
Rustic Cutting Board Holiday Project (above)
The cutting board project above is decorated in a rustic style, with a red-and-white cloth pouch attached (likely secured with hot glue). The words “Merry Christmas” are written on a separate piece of fabric and added to the pouch.
Inside the cloth pouch are Christmas greenery, red berries, pine cones, and a taper candle. A piece of rope is tied around the pouch for an added decorative touch. This image was found on Pinterest without a source, so you’d need to assemble the project based on the photo.
Transforming and Upcycling Cutting Boards:

With a bit of creativity, these humble boards can find a second life as home décor, serving essentials, or even practical organizational tools.
Why Upcycle Cutting Boards?
Upcycling isn’t just about saving money—it’s also about reducing waste and adding personality to your home. Wooden cutting boards, in particular, are sturdy and versatile, making them perfect for a wide range of DIY projects. By upcycling, you:
- Reduce kitchen waste by repurposing old items.
- Create custom home décor tailored to your style.
- Save money by transforming what you already own.
- Add rustic charm with one-of-a-kind pieces.

Sadie Seasongoods created this cutting board project.
How to Transform and Upcycle Cutting Boards: Step-by-Step DIY Guide
With just a few tools and a little creativity, cutting boards can be transformed into rustic serving trays, wall décor, shelves, and more.
This step-by-step guide will walk you through upcycling cutting boards into unique, functional pieces for your home.
What You’ll Need
Before you start, gather these basic supplies (adjust depending on your project idea):
- Old cutting board (wood or bamboo works best)
- Sandpaper (medium and fine grit)
- Food-safe mineral oil or wood conditioner
- Paint, stain, or chalkboard paint (optional)
- Handles, drawer pulls, or hooks (for trays or hanging boards)
- Drill and screws
- Wood glue or brackets (for shelving projects)
- Paintbrush or foam brush
Step 1: Clean and Sand the Cutting Board
- Wash your cutting board thoroughly with warm water and mild soap.
- Let it dry completely.
- Use medium-grit sandpaper to remove deep knife marks, stains, or rough spots.
- Switch to fine-grit sandpaper for a smooth finish.
Tip: Always sand with the grain for best results.
Step 2: Choose Your Project
Decide how you’d like to upcycle your cutting board. Here are a few beginner-friendly options:
- Serving Tray – Add handles and refinish.
- Charcuterie Board – Oil and reseal for entertaining.
- Wall Art or Menu Board – Paint with chalkboard paint.
- Mini Shelf or Riser: Add brackets or short legs.
- Gift Board – Personalize with paint, stencils, or wood-burning.

Re-Fabbed is responsible for this cutting board project.
Step 3: Apply Finish or Paint
- For a natural, rustic look, apply wood stain, then seal with food-safe oil.
- For a colorful or modern look, paint the surface with chalk paint or acrylics.
- For a functional kitchen piece, use chalkboard paint so you can write menus or notes directly on it.
Let everything dry completely before moving on.
Step 4: Add Hardware (Optional)
If you’re making a serving tray, shelf, or wall piece:
- Mark where your handles, hooks, or brackets will go.
- Drill pilot holes to prevent splitting.
- Attach the hardware securely with screws.
Step 5: Seal and Protect
Finish your board with a protective coat:
- Use food-safe mineral oil on boards that will come into contact with food (cheese, bread, charcuterie).
- Use a polyurethane or acrylic sealant for decorative or non-food projects.
Step 6: Style and Enjoy
Now comes the fun part—putting your upcycled cutting board to use!
- Style it as a centerpiece on your dining table.
- Hang it on a kitchen wall for rustic charm.
- Give it to a friend as a personalized keepsake.

Upcycling cutting boards is an easy, eco-friendly DIY project that adds charm and character to your home. With minimal sanding, finishing, and a touch of creativity, you can transform a worn kitchen tool into a functional piece of art.
So next time you’re about to toss an old cutting board, pause and imagine the possibilities. From serving trays to wall décor, you’ll be amazed at how much potential that simple piece of wood holds.
Creative Project Ideas to Transform/Display Cutting Boards:
1. Rustic Serving Trays
Turn an old cutting board into a serving tray by attaching handles or drawer pulls. Sand and stain the wood for a fresh finish, and you’ll have the perfect piece for serving appetizers, charcuterie, or breakfast in bed.
2. Kitchen Wall Art
Cutting boards come in various shapes and sizes, making them ideal for wall displays. Paint them with chalkboard paint to create a weekly menu board, stencil inspirational quotes on them, or use them as a backdrop for hanging utensils.

You can check out this project at Burlap Kitchen.
3. Cheese and Charcuterie Boards
A cutting board with too many scratches for daily chopping can still shine as a serving board. Clean and reseal it with food-safe oil, then use it as a stylish charcuterie or cheese board for entertaining guests.
4. Plant Stands and Shelves
With a bit of imagination, larger cutting boards can be transformed into mini shelves or stands. Attach small brackets to the wall, or add short legs to create a rustic riser for plants or candles.
5. Personalized Gifts
Upcycled cutting boards make meaningful, personalized gifts. You can wood-burn initials, paint floral designs, or decoupage family recipes onto the surface. These handmade creations make thoughtful, eco-friendly gifts.

Organized Clutter used her cutting board to create a cute tray.
Tips for Successful Upcycling:
- Sand thoroughly to remove deep knife marks and stains.
- Seal the wood with food-safe oil if the board will be used for serving.
- Experiment with finishes—stain, paint, or even epoxy resin for a glossy, modern look.
- Mix and match sizes if you’re creating a wall display or gallery.


3 Types Of Cutting Boards:
- Wood Cutting Board
- Plastic Cutting Board
- Bamboo Cutting Board
- Glass Cutting Board
Upcycling & Decorating Projects:
Decorative Signs: Paint a wooden cutting board with chalk paint, add lines using painter’s tape, and apply a dry-brushed distressed finish for a French farmhouse look.
Tablet Holders: Attach a candle cup to each corner of a cutting board to create a stable base for a tablet, making a functional holder.
Gift Baskets: Incorporate a decorative cutting board into a gift basket with items like cheese knives, spreads, or gourmet oils.
Centerpiece Elements: Use a cutting board as a rustic base and arrange decorative items atop it.
Organized Clutter created these two projects.
Quick Dollar Tree DIY
- Paint: Apply a base coat of white or off-white chalk paint to the cutting board.
- Create a Pattern: Use painter’s tape to draw lines, then apply a dry-brush technique with navy blue chalk paint to create a grain sack pattern.
- Attach Hardware: Glue on candle cups to the corners and attach small handles with wood screws for added detail.
Transforming and upcycling cutting boards is a simple way to add a touch of creativity to your home while practicing sustainability. Whether you turn one into a serving tray, wall décor, or a personalized gift, the possibilities are endless.
Instead of discarding your worn-out cutting boards, see them as blank canvases waiting for a second life. With just a few tools and a spark of imagination, you can turn something ordinary into something extraordinary.


I love how you have styled your own cutting boards in the apartments you have lived in Brenda. They are magazine worthy.
Those are all great ideas! I especially liked the hot chocolate station, and I thought the mod podge one was pretty. I can’t wait to see what you do with yours, when you get your new place.
I never cease to be amazed by how creative people are with items I wouldn’t even look at twice ordinarily and think “that would make a really cool decor item.” I love how you put together all those vignettes and hunt down all those beautiful photos from other websites for us. They are a feast for the eyes. I ooooh and aaaah my way through them as if I was looking for tha special gown to go to the ball in, but Cinderella I’m not. Sigh. I have an old heavy glass cutting board that gets used daily for making sandwiches, slicing veggies, etc. Used to have a smaller wooden one but I think it’s still packed away in storage in the basement, or I gave it away when I downsized to this home – don’t remember and too lazy to go digging through boxes to see if I still have it! The glass board is easy to keep clean but nothing to write home looks wise, just utilitarian, I like it because it’s basically “invisible” on the countertop. I admire all those pretty looking kitchens on the internet and then I look at mine and sigh. Mine isn’t pretty by any stretch of the imagination and right now the breakfast bar countertop area is cluttered with unpaid bills, a stack of unread HGTV Magazines, a spray bottle of vinegar and water to kill the green stuff growing on my outdoor rug in the Shezebo because of the endless bouts of rain and unending extremely high dew points that makes it feel like we’re living in a steam bath. There are goodies I put out for my critters (birds, chipmunks and squirrels) (unsalted shelled peanuts and raisins) including a large cardboard box holding 10 pounds of mixed nuts in the shell and 15 pounds of unshelled almonds sitting on the floor. My critters have expensive tastes and my kitchen will never be pictured on the internet.
I’m very picky about photos I choose online. They must be a certain size so they are all the same. I’m compulsive that way! It’s your kitchen and I’m sure you love it. That’s all one needs. And I know the wildlife around there sure appreciate you!
Wow!!! What a fabulous post, Brenda. Thank you so much for working hard to provide all the information and ideas.
Over the years I’ve enjoyed the way you’ve used your cutting boards for decor. I’ve wanted to do something similar but had no idea where to start. I appreciate your ideas and information.
I go to Pinterest and just browse and scroll.
That grater recipe holder is so cute! I want to incorporate cutting boards into my next kitchen setup. It’s always fun to see you style them!
Cutting boards are so versatile because they’re all different sizes and materials.
I love cutting boards..This article gives me inspiration….I do have a vignette of boards and long bread bowls on my kitchen counter..I’m lucky I have a sweet board in the shape of a pig, that my Dad made in shop in high school, we are back in the 1930’s…..the pig is great for charcuterie….have a great week….
I love the ones I have seen that are pig-shaped!