
Apartment Kitchen Redo #3
This post may contain affiliate links. If you purchase through links on my site, I may earn a commission at no cost to you. For more information, please see my disclosure policy.
Believe it or not, this is my apartment kitchen redo #3.
I got the knobs painted black, and things dried faster than I thought. So now my kitchen redo #2 is complete, and I can show it to you.

First Apartment Kitchen Redo:
This was redo #1. When I used contact paper on both the countertops and the backsplash. I loved it at first, but then all the color and pattern started being too much.
Below was my first kitchen, before the boho tile decals, and you see the shelf liner on the wall here.
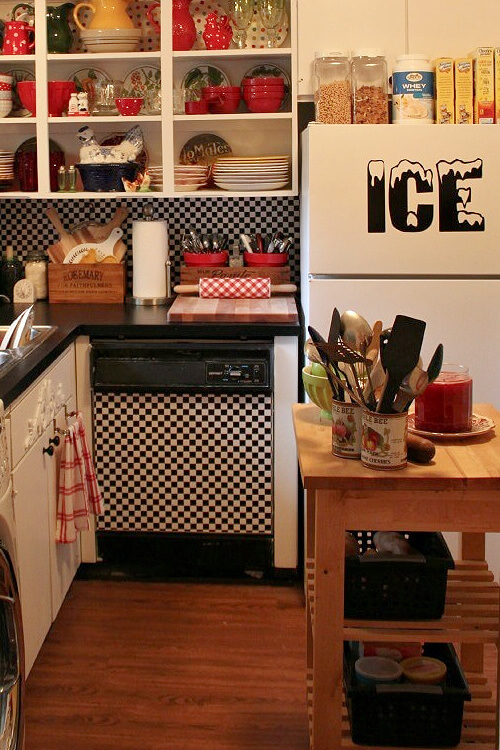
The contact paper applications didn’t hold up well. The liner on the wall kept coming down. So I had to scrap that and come up with something else.
Which leads me to apartment kitchen #2.
Second Apartment Kitchen:
I decided to go for a bohemian look, but have it be more muted than all the checks that came before. From an Etsy shop, I ordered this boho backsplash.
The kitchen doors were reattached, and I repainted them. I gave them a coat or two of fresh white paint.
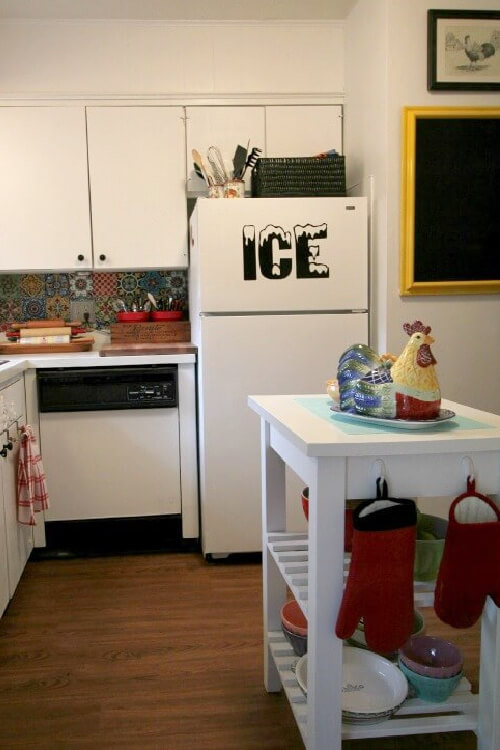
I went with this look for a while, but the decal tiles didn’t hold up all that well. When hot water creates steam in a kitchen, sticky things sometimes come undone. And after a bit, pressing them back in is a bother.
I put my thinking cap on once again.
Third (+ Current) Apartment Kitchen:
So, this is the third redo in less than two years. Have I lost my mind? Maybe. Sigh. Probably.
I guess I get restless and want to try something new. Does that happen to you?
Using GianiGranite Countertop Kits:
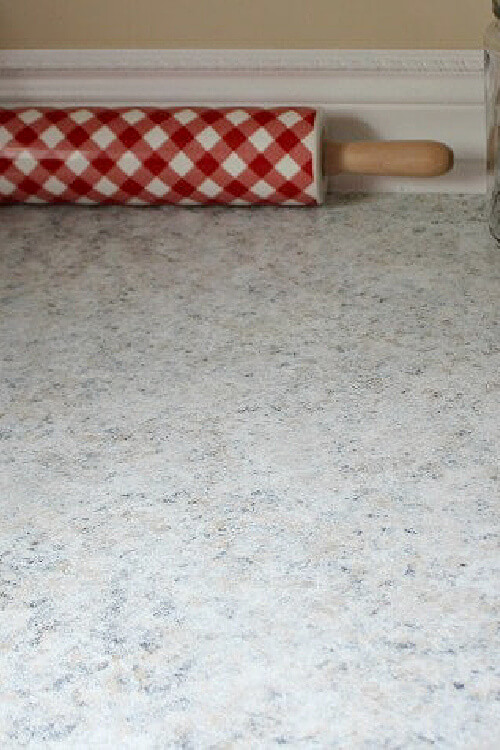
This is the GianiGranite countertop project I DIYed. I got a free product kit of my choice from GianiGranite. After all the detailed applications, which are done in stages to give it a granite-like look, you apply the topcoat.
With GianiGranite, you can order various types of styles and colors of paint.
When using the GianiGranite kit, first, you roll on black primer. Then you have three colors to sponge on with the sea sponges they send you with the kit. You keep going while it’s wet, sponging on each color. One after another.
As soon as I started applying it, I worried that the boho-style backsplash wouldn’t work with the GianiGranite paint kit.
I just didn’t like the granite look with the colorful bohemian backsplash tiles. Which led me to take down the colorful bohemian decals.
Then I went to Lowe’s to pick up paint samples and trim.
I ended up painting the backsplash wall a tan color and was more pleased with the result. A more sedate look seemed to work better, I thought.
Giving The Cabinet Doors Personality:
I headed to the stores for inspiration for the cabinet doors. Sometimes I get ideas just walking down the aisles in stores.
I walked through Michael’s to see what they had, but came up empty.
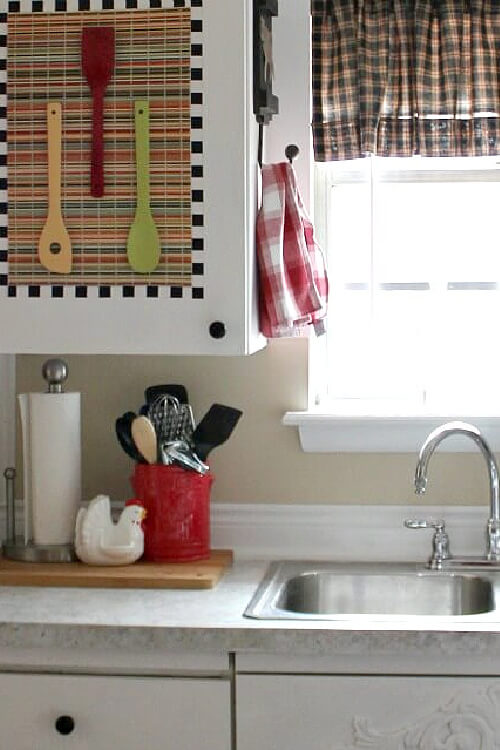
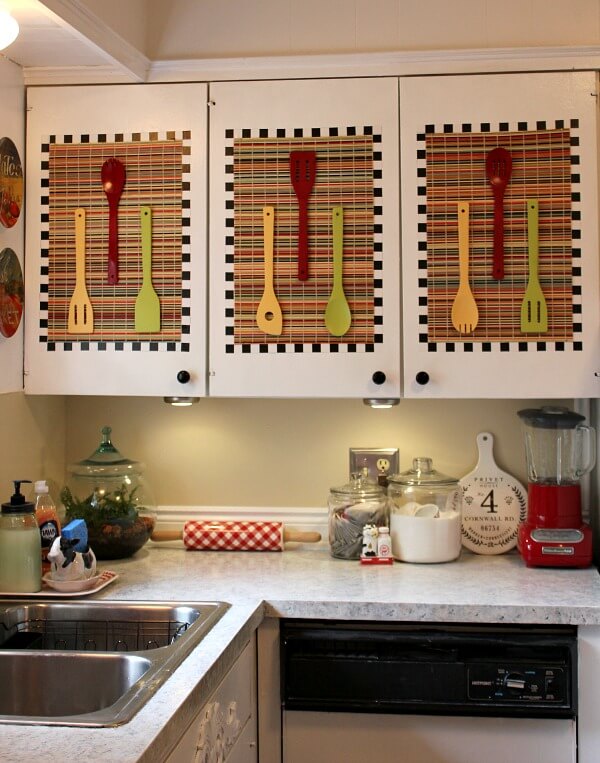
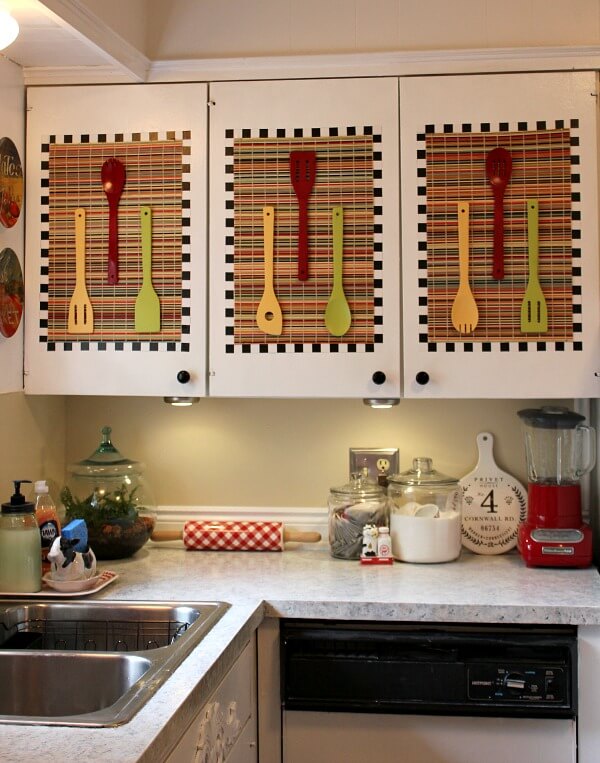
Then I strolled through the kitchen section at Bed, Bath, & Beyond. I found the colorful reed-style placemats and decided they might work on the cabinet doors.
Then I came upon bags of wooden spoons and other utensils. They were in a net bag, and I bought four bags for $5.99 each.
I ended up tacking the placemats to the middle of the cabinet doors. Then I applied strips of black-and-white checked contact paper I had from the previous kitchen redo to resemble a frame of sorts.
The place mats are simply nailed on the cabinet doors with short nails, as were the wooden spoons. They can easily be taken down if need be.
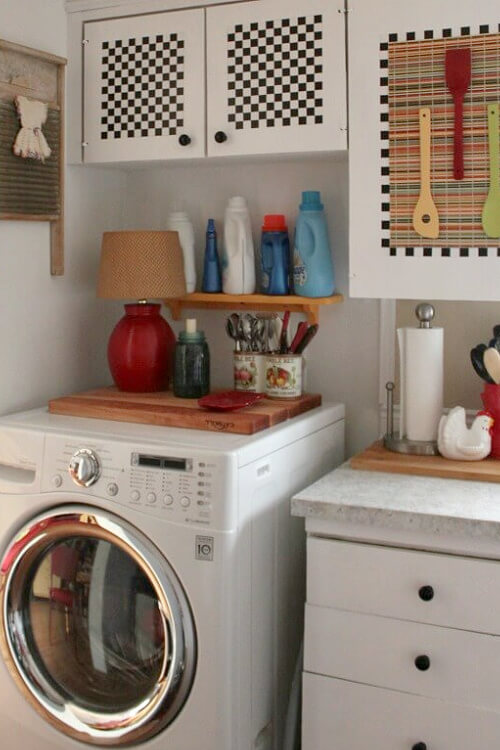
I had enough of the black-and-white contact paper left to apply to the smaller doors up above. This brought every cabinet door together, so to speak, I decided. They were too small for the larger placemats, and that would have looked too busy anyway.
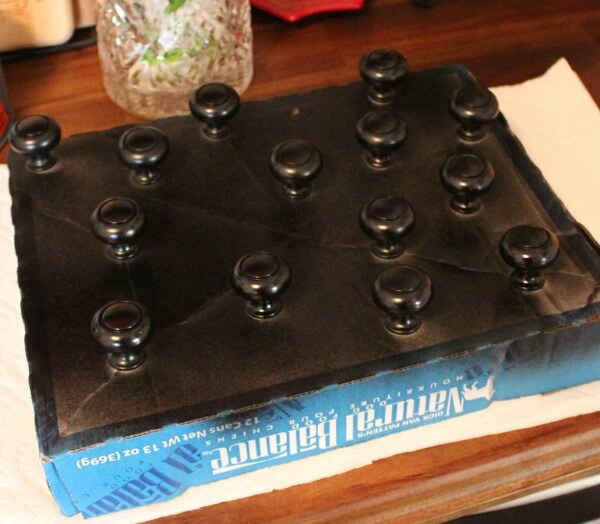
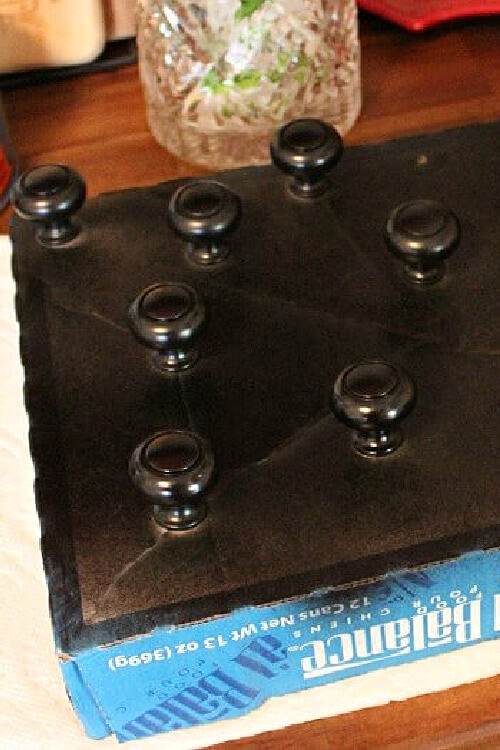
I painted the brown knobs I purchased for another kitchen renovation black. And I painted them using the trick you see above. The instructions are below.
How to Paint The Knobs Using a Cardboard Box:
First, you find a cardboard box that has room for all of the knobs. The whole point is to get all parts of the knobs painted well, and do them all at once to save time.
You poke holes in the cardboard with the knob screws. Then you hold the screws underneath while screwing the knob on from the top. And then you apply the spray paint.
Valance from a Quilt Shop:
The valance was gifted to me by an online quilt shop. The fabric is good quality, and I love that the valance is lined, because the hot sun comes through this window in the afternoon.
The lined fabric will help keep the heat out during the summer months.
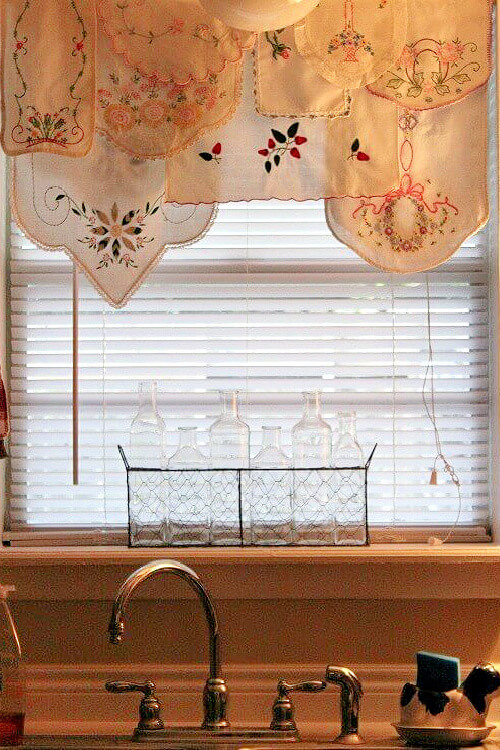
So the layers of vintage linens I had across the curtain rod were taken down to make room for this valance.
Coffee Bar on Opposite Wall:
This is my little coffee bar arranged on the World Market Wooden cart I ordered.
I found the red cupboard, already painted red, at the antique mall and hung it on the wall. This gave me more storage space, which is always a good thing in a kitchen.
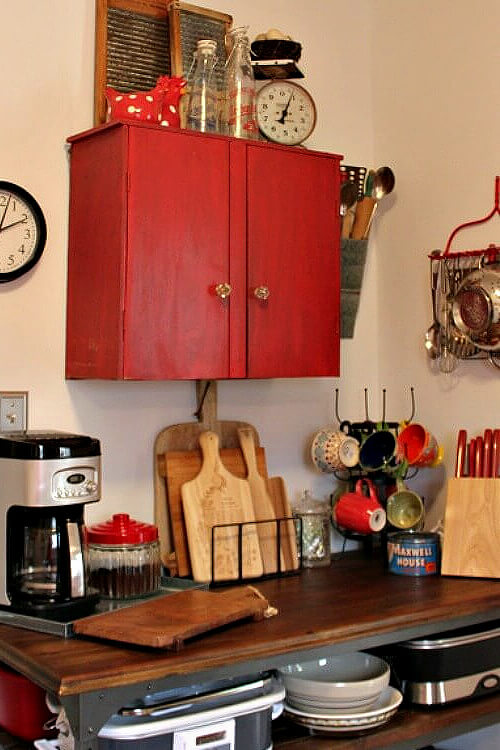
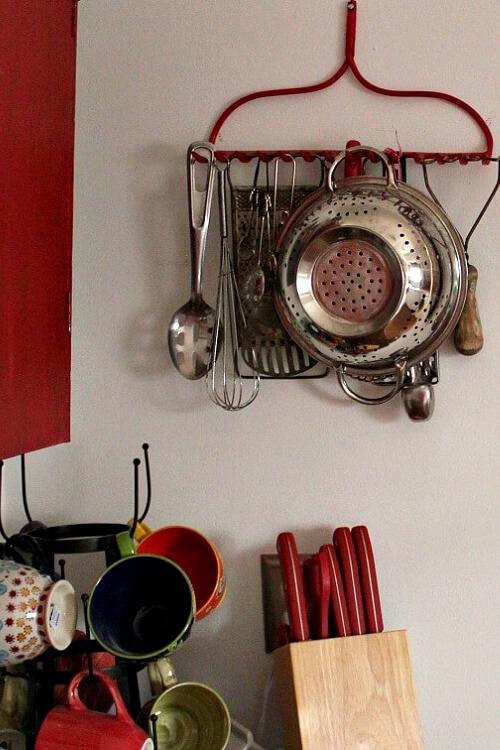
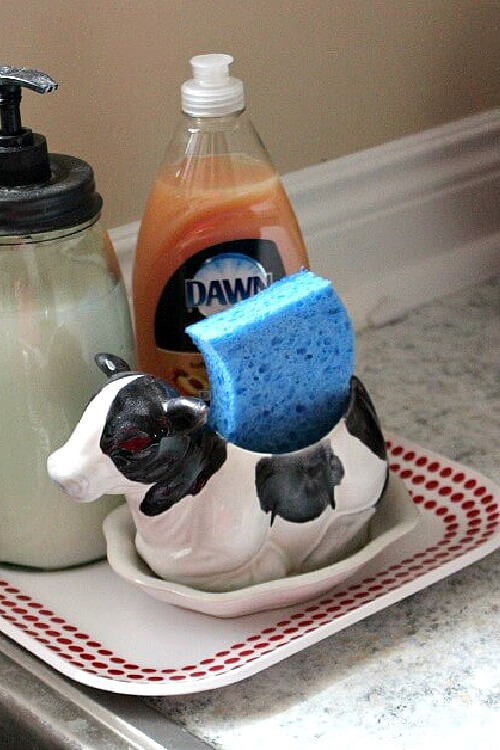
I’m using a little cow planter I found at the thrift store to hold my kitchen sponge. The rake is painted red and hung on the wall for vertical storage.
So that is the completed kitchen redo. Number 3. I believe that I’m done for a while!
I decided that my instincts about the backsplash decals were correct. The tan paint job looks much better. Less busy, which was the point.
So there you have it. It may not be everyone’s cup of tea. But I like things to be a little unique.



Good Morning Brenda,
Such fabulous looking counter tops, I just know how much work they were, but wow so worth it!
Your kitchen always looks amazing, but this is my favorite yet!
Jemma
On that last part I do believe I agree! The counter tops weren't all that much work. It was everything else I added to them!
Wow, what a vibrant kitchen! I could definitely be inspired in a kitchen like that! I can't believe you made all of these changes in 2 years! That's ok, I also get bored with the same look, I only wish I had more time to change things up. The counter looks fantastic. I wonder if they have these types of kits here in Greece?
You should be able to order them online. And I would agree, it's certainly vibrant! (Or maybe just colorful.)
Oh my gosh, I totally love it all! Brilliant redo, Brenda! I am in awe of your decorating talent…
I don't know if it's talent as much as it is that I get "playing" with color and objects and just have so much fun!
It's beautiful! I love it. The window is lovely too, although I really, really loved the vintage treatment 🙂 Enjoy your new kitchen!
Well, I can always put the vintage treatment back up. An easy fix.
Wow Brenda, it look so pretty and fun. I love the brightness of the space. I hope you are doing great hun! ~Hugs~
Well, I'm going to take it easy for a few days I think.
Showing all of your kitchen renovations in one post DOES make me think you are channeling Mary. Had a good laugh at that one! 🙂
Those black and white checks have sort of been a staple in my decorating for years.
Brenda I really like your kitchen.
Thanks for sharing
The counter tops look beautiful…good work! I love the new valance and although I loved the colored bottles, I can see that they wouldn't really work with it. Your creativity is amazing and I like how you are not afraid to tackle any project or try something new.
Well, I am afraid to tackle some projects, especially those that require expensive tools. Because I don't have them!
So creative and so you, Brenda! Your countertops turned out amazing. I may have to do this. I keep thinking we'll be getting marble or quartz "soon" and then the kids keep wanting to play more sports ($), we need the plumber, vet bills, gravel for the driveway, etc. This could be a good fix. Thanks for sharing! ~julie
With all the men/boys in your farmhouse, I'd go with this. Because I've had real granite and it chips. I'd wait till the boys are in college or married and then splurge!
Nice Brenda!
The counter tops look great and I love the black and white checker paper on the cabinet above the fridge.
That was all I could think of for those small doors overhead. Maybe, given another week or so, I could have come up with something else.
super cute and unique! xoox Su
Well, it's certainly unique.
Your counter tops are so pretty Brenda.
Isn't it amazing how one thing leads to another in a project.
Your creative spirit shows.
One thing ALWAYS leads to another, it seems.
Your countertops look like marble. Beautiful!
I kind of thought the same thing. Looked more like marble than granite. I think it was the extra white I kept adding. But I like it. Thanks!
CRAZEEEE about those countertops! They look amazing. I love all your kitchens. You are so creative!
If you can't afford the real deal, for less than a hundred dollars you can do this.
Your kitchen looks fabulous. Those counters turned out amazing.
This system really does work great. I have to commend this company on a great product.
It looks great! Love the countertops!
Oh, Brenda! Your kitchen looks wonderful. I just can hardly believe your counter top is painted on (I do believe you did it, I'm just complimenting you :). Wow! You did do a great job on it and it looks like granite! What a cute idea with the placemats and wooden utensils! You have such imagination. Now get ready, another magazine will be knocking at your door again.
Be a sweetie,
Shelia 😉
I think I have the energy level of a 20 year old, and the body of a 70 year old. But my energy always seems to win out and then I'm benched for awhile!
Everything looks amazing, Brenda! Those placemats are so clever. Great job on the counter tops!!! You worked hard on this big project and it was well worth it. Love it all.
I thought I was just going to do counter tops. Then I started painting everything. Then I started with the cabinets and spray painting the knobs. So what I thought would just take a few days took more than a week.
oh wow! everything looks so awesome 🙂
Great new look! LOVE the counter tops. I have been looking forward to seeing the redo! Wonderful job!
Brenda, this turned out beautifully! You did a wonderful job on the countertop and I love the idea with the placemats and wood utensils! It's very fresh yet still has color! Now you can enjoy your pretty new space!
Like I said, the cabinet doors aren't everyone's cup of tea. But Linda, you're a free spirit like me, and I know you would have done something a little crazy too!
Your counter tops came out fabulous. Good job!
Good job on the kitchen, Brenda! How long did it take for the three different coats on the counter, especially that last one to dry? With my cats I would have to make sure it was good and dry or I'd have foot prints. I read what it said on their website, but wanted to know what the dry time actually was for you.
It didn't take long. What you have to watch is to make sure the clear top coat is dry.
The counter tops are fabulous! I bet that was a lot of work but it looks expensive. Nice work. 🙂
I like the kitchen a little less busy.
Yeah, now when I look at that first kitchen, it's sensory overload! Well, it took me a couple of hours to sponge on the three colors. And I kept staring at it to see if I needed a little more of one color somewhere, then would dab a little more of that on. I mean, if you mess up, you could simply roll on the black again and start over. But I finally got in the groove, after watching the video about 25 times, and the job got done.
Brenda, thank you for linking your pretty kitchen with Thoughts of Home on Thursday. I'm thinking you are a great spokesperson for the counter top refinishing kit. 🙂
Your kichen looks so YOU, Brenda! Cheerful and colorful, with touches of unexpected and clever features. And your countertops are perfect … They fit in so nicely in your happy kitchen. You did great!!!!
I was so afraid the GianiGranite counter top look was not going to look right with my "stuff." Thus I went to great lengths to try to reach a happy medium.
I think the kitchen looks wonderful. I love the place mats and spoons on the door! The colors are warm and inviting. The counter top turned out really nice!
To me it was somewhat bland before I put up the place mats. Now most people would probably have just been happy that the counter tops turned out so well and a few other things got done. But I just needed more color.
Your kitchen looks beautiful Brenda! I especially like the red cabinet and that rake that holds kitchen things is awesome! Nice job once again 🙂
Isn't it funny how many looks you can get out of one little apartment kitchen?
Clever re-do of your kitchen…I love it!
I jump into the middle of a project. And generally I have no idea what I'm going to do. So it's exciting for me to get to the end too!
I'm sorry. It was the shade of color I chose at Lowes. #HGSW3137
Oh, and it is Sherwin Williams Showcase Paint and Primer in semi-gloss.
What is the almondine paint? Is that the name and what brand? Thanks! You kitchen looks great!