Change The Look Of Countertops With Contact Paper
This post may contain affiliate links. If you purchase through links on my site, I may earn a commission at no cost to you. For more information, please see my disclosure policy.
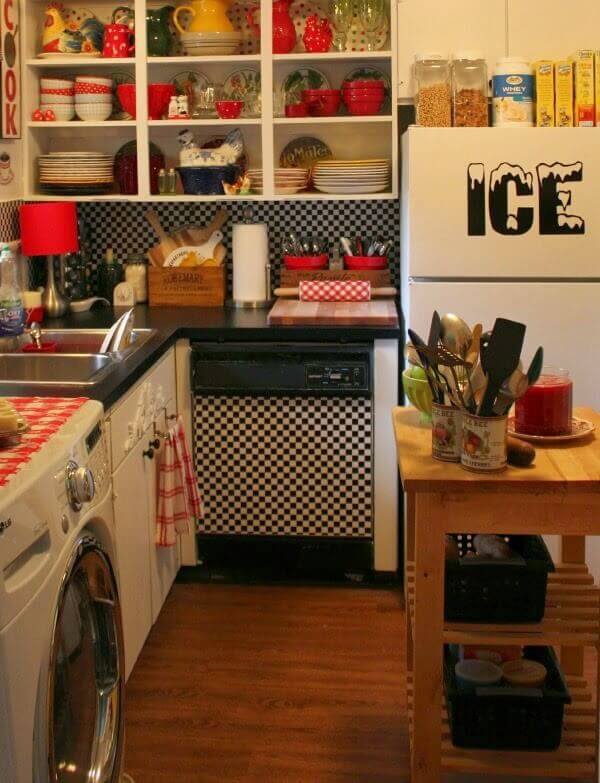
Did you know that you can change the look of your countertops with contact paper? It is a cheap fix, not a permanent one. But if you have rental countertops you can’t change, you might consider this option.
If you’re not patient, this project will be tedious and aggravating at times. But if you can work past that, you can really change the entire look of your kitchen.
When I showed you that I used a simple $5 roll of contact paper on my kitchen countertop, some people asked questions.
But I did not only do the countertops; I also used a different type of contact paper to cover the backsplash and the front of the dishwasher.
Was It Sticky & Hard To Do?
Yes, in places it was.
I was looking online last night and discovered contact paper that will not stick to itself. It wasn’t cheap like the contact paper I bought, but looking back, I see it might be worth it!
I have to say, this was the cheapest route, with the restrictions I had living in an apartment.
I don’t know how other people do this, though I did watch a few YouTube videos and got some ideas. But when it comes down to it, you simply have to find your own way.
Points I Want To Make:
Start in a corner and work outward. That’s if you’re using patterned or checked contact paper. I didn’t do it that way, and I regret it.
I’ll probably take some of the contact paper down and do that. I’d have a better chance of getting the checks lined up.
I didn’t work horizontally. I figured that it’s only 17 inches, and I’m still going to be about 8 inches short, so I chose to bring the length toward me.
In other words, the 17 inches began where the corner and the countertop started, and I worked toward myself.
After all was said and done, I liked the look of this technique better. Adding contact paper to your countertop is a quick fix (if you’re patient). But it isn’t a permanent solution.
Overlap The Seams:
When you put one piece down and are ready for another, overlap the first piece by about half an inch.
Contact paper is water-resistant. But if you don’t overlap the contact paper on your countertop, water could collect at the points where the pieces intersect. That was my fear anyway.
I watched a few YouTube videos of how others did this. Particularly when I got to the section where I had to lay the contact paper around the kitchen sink.
Remember that it is stretched tight. So don’t cut too close. Give yourself some leeway if the stretch causes the contact paper to move away from the sink area.
It’s easier to cut a little more contact paper than to start over with this countertop project.

Be Aware that Contact Paper Sticks To Itself:
Please understand that contact paper will stick to itself. I mean, that is obvious, but something you might not have really considered before starting this project.
My technique was to pull the paper away from the sticky part by about 10 inches. Then I folded the paper back upon itself.
This method allowed me to cover the countertop with only 10 inches of sticky contact paper at a time.
I suggest using something like a credit card to gently smooth it down as you go. Then, I would pull another 10 or so inches of contact paper and keep going. This made it much less likely to stick to itself.
But if I took on this countertop contact paper project again, I think I’d save my pennies and buy the type of contact paper that doesn’t stick to itself. It might keep my blood pressure from rising when trying to extricate myself from sticky contact paper!
Bubbles in the Contact Paper:
My countertop surface was textured, so there were a LOT of bubbles in the contact paper.
To work out the bubbles, take a straight pin and make a pinprick in the bubble, then try to smooth it out. This worked for me in most places; you will never see the pin prick.
And folks, remember, this is a real budget job, so there will be a few imperfections. Things like that usually bother me. But I have to look closely to see them, so I’m not going to sweat it.
Using contact paper is an economical way to completely change the look of your kitchen countertop. But you will have to be careful about putting a hot pan on the surface when cooking.
I suggest designating a preparation and cooking station with a large cutting board. Then you won’t make the mistake of putting a hot pan right on the contact paper over your countertop.
You can also place cutting boards over areas or seams in the contact paper that particularly bother you. Then you won’t see the imperfections at all!
Like I always say: if you can’t fix it, then cover it!


You never cease to amaze me with your decorating, love the kitchen. You prove that the old say, "where there's a will there's a way".
I was so excited when I saw the article on your Little Blue House in the Country Sampler magazine. Your use of color has inspired me to take the leap and add some color to my own decor. I love your red hutch and your touches of red throughout your home, and would love to know what brand and color of paint you use. It is the perfect color of red without being overpowering. Your blog is so inspirational. I love it!
Well, thank you, Karel! I didn't paint the hutch. I bought it that way at an antique mall years ago. I did, however, paint the potting bench. But you haven't seen that painted red yet. I simply grab a swatch and just hand it to the guy at Lowes or wherever. I used Valspar. I have not branched out into the milk paint and all that. I don't know enough about it, and I'm not paying a fortune for a small can of paint! But all the paint colors are kind of overwhelming to me. I just go for a red that isn't orange-y in the least, but more toward barn red color.
Thanks Brenda. Thats a great idea 🙂
Dear Brenda I have just come back from a holiday and found your stunning new kitchen makeover!! You are so creative, what an amazing change you have achieved and how clever to be able to make the original kitchen so much your own style!! Hope you have a happy week!
Helen xox
Thanks Helen. I imagine with your creativity and skills that you have lovely spaces. And I'd love to see them!
Your dishwasher really blends in now! Love, Love, Love.
Beautiful! I really love this one! I am going back and look at all the pictures again. I always find things I didn't see when I go back.
I've been adding other things. I will take more pics later this week to show you. I'm getting ready to make a gallery wall in my living room. Had to change some things up, but I miss my gallery wall from the little blue house!
It's good that you have patience to do projects like that. I once tried to hang wallpaper and I it was a disaster. I have always had to pay someone to wallpaper or install tile etc. Glad that you found a way to update your kitchen and make it reflect your style.
Believe it or not, I can hang wallpaper better than I can paint!
I would not have the patience to use this stuff. I know I'd probably have it stuck to me and I'd be a wreck!
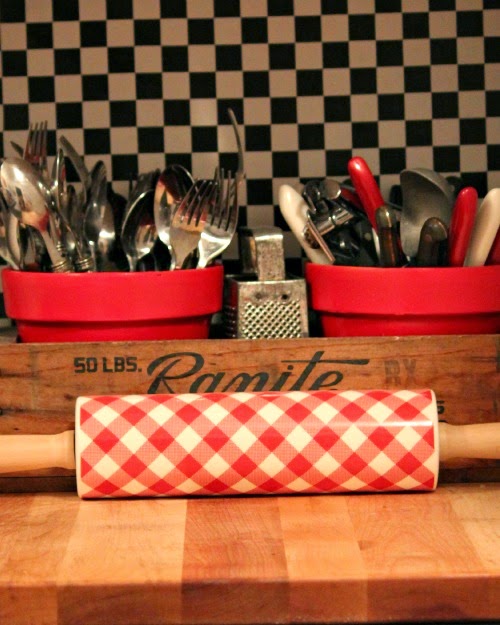
It's been fun to see your kitchen again. The black counter seems integral to the decorating scheme, and I admire you for taking on that sticky project. It turned out well. I love the decorative piece you put onto the front of the sink. It's a nice vintage touch that keeps the black and white checks from pulling the look too much into the 1950s. I think the metal sheen of the little lamp goes well with the sink, but I'd like to suggest that you add a touch of lace or a few buttons to the pretty red lampshade to give it a bit more texture. This isn't a criticism — it's just that the red shade seems to be saying, Hey, I'm an untouched canvas! (I bet you've probably already thought of something, and you've just been too busy to get to it.)
I had to delete my comment above because it answered the wrong comment somehow! I think you're right. I shall be thinking of ways to adorn the little lamp. I don't take any suggestions as criticism. Suggestions are integral to getting the look you want.
Hi Brenda
I don't think I've commented before but just wanted to say I LOVE your kitchen re-do. It looks amazing. And love that you did it on a budget.
It's gorgeous!
Cheers
And what's great is, anyone can do it, and have the kitchen they've always wanted without expensive materials.
I love it! As I've said before, all of your color is great!
Color should have been my middle name.
Hi Brenda! I'm out traveling but wanted to check in on you! Oh, I would not have thought this was contact paper! Your kitchen looks so cute and you did a great job. I had trouble just trying to get the contact paper to lie down and not stick to itself under my kitchen cabinets. You're the most creative one.
Be a sweetie,
Shelia 😉
It took great patience!
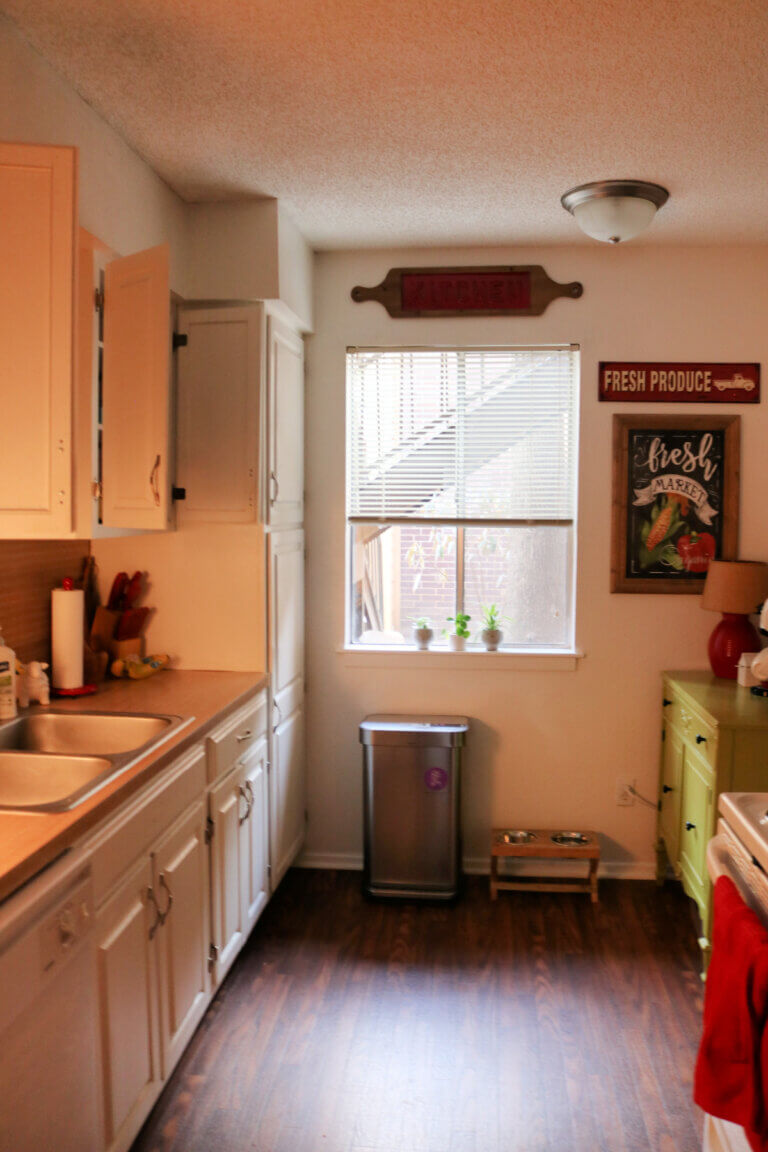
I'm just loving your kitchen so much!! Every nook and cranny is amazing. I love all your bottles on the window sill too!!
Kathy
I use those colored bottles to hold the faucet and hose in place when doing laundry. To guide the water in the right spot in the sink!
I LOVE your new kitchen Brenda..you have so much talent and know right where to use it…looks so cozy!! Carol
That's what I was going for. Cozy. A friend's husband saw it online and I asked him what he thought: He said it looked like something from the 30s. I think he thought that wasn't so great. I do!
I really love everything about your kitchen! You definitely have the touch when it comes to decorating. Using contact paper on the counters and walls is so clever. Absolutely amazing! Excellent tutorial…
I can do wonders with thrifted and budget finds. But I know zilch about expensive antiques, pottery, etc. Zilch.
I don't seem to have as much patience as I used to. I might have rolled it all into a ball and chucked it the first time it stuck to itself. It looks great. 🙂
Laura
Oh, I have little patience. Ask Judy. But I was determined.
This looks so good. I wondered about the apt rules of this kind of decorating, but figured it can be removed I guess. Love the thought of red in the bathroom!
If it can be removed and not leave anything behind, seems to be okay.
Oh thanks! Ive been looking at contact paper online and elsewhere. This is awesome. Who would have thought? Thanks for sharing this today. Love your new banner!!
I just can't stop playing with graphics. Seems to calm me.
Brenda, I love the black/white check. It sets of those pretty dishes. Blessings, xoxo,Susie
I'm a gingham look girl.
Brenda, since the first blog post that I saw (back in Texas), I have been amazed at how talented and resourceful you are! Your new home, may not be as fancy as your former homes, but you have made it your own and it is charming! I wish that I was as talented as you are, you make it look so easy! Keep up the great work!
Well, when you don't have much money, you get real creative real quick!
Yes, and it isn't coming up either. We'll go back and see in a few months.
I remember thinking "She did that around her sink! " and thinking that it would be very hard to do! 🙂
Well, it's not that bad. And when you have a whole roll or contact paper in case you make a mistake, it's not that scary.
Brenda, still loving your kitchen. I noticed you are hanging a towel under you sink, I see two hooks? what did you use since hubs wont' let me put any "holes" in our cabinet!
What is it with him anyway? I got that at Target for about $7.99. It just goes over the door. No holes at all.
Why Brenda, he's simply a man, you know what I mean!
Guess that's why I live alone.
One house we rented I used the brick contact paper for my kitchen counter back splash. I remember reading a suggestion to dip the contact paper in water (peel back off first) and it would be easier to work with. I remember doing that and It worked nicely for me. I had no problems with it wanting to come off.
I shall remember that!
It sure is cozy!!!!! Love the checks.
On the wall, you don't really need to overlap. Checks are easy to line up!
I am thinking about attempting this but I'm not not sure..I'm not quite as brave as you are Brenda..lol..
I would love to have a solid red for the bathroom. I found the kind that doesn't stick to itself and is easily repositionable at http://www.designyourwall.com. It is 18 inches by 49.5 feet! It is $45.50, but you get A LOT. Nearly 50 feet. You might could go around your house with this stuff!