
Apartment Kitchen Redo #3
This post may contain affiliate links. If you purchase through links on my site, I may earn a commission at no cost to you. For more information, please see my disclosure policy.
Believe it or not, this is my apartment kitchen redo #3.
I got the knobs painted black, and things dried faster than I thought. So now my kitchen redo #2 is complete, and I can show it to you.

First Apartment Kitchen Redo:
This was redo #1. When I used contact paper on both the countertops and the backsplash. I loved it at first, but then all the color and pattern started being too much.
Below was my first kitchen, before the boho tile decals, and you see the shelf liner on the wall here.
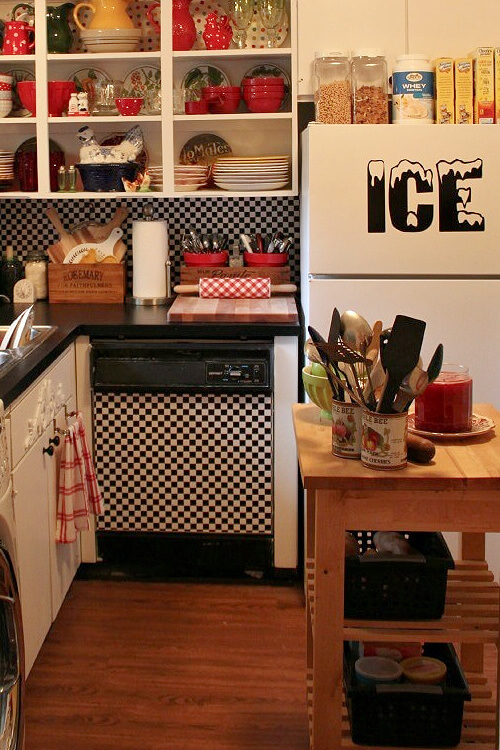
The contact paper applications didn’t hold up well. The liner on the wall kept coming down. So I had to scrap that and come up with something else.
Which leads me to apartment kitchen #2.
Second Apartment Kitchen:
I decided to go for a bohemian look, but have it be more muted than all the checks that came before. From an Etsy shop, I ordered this boho backsplash.
The kitchen doors were reattached, and I repainted them. I gave them a coat or two of fresh white paint.
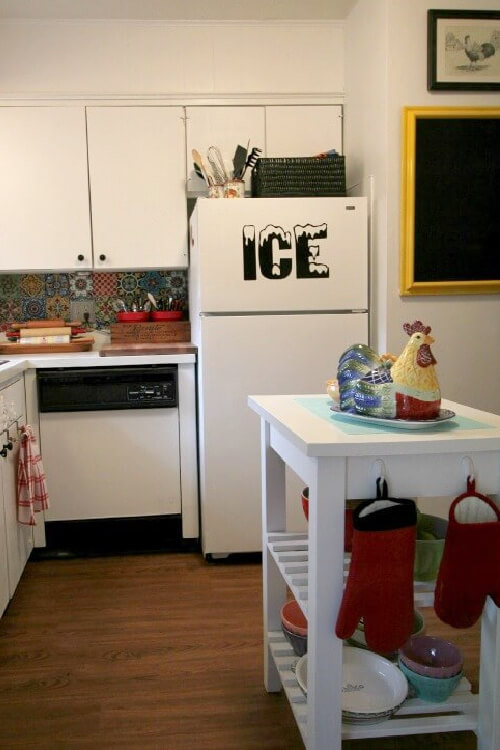
I went with this look for a while, but the decal tiles didn’t hold up all that well. When hot water creates steam in a kitchen, sticky things sometimes come undone. And after a bit, pressing them back in is a bother.
I put my thinking cap on once again.
Third (+ Current) Apartment Kitchen:
So, this is the third redo in less than two years. Have I lost my mind? Maybe. Sigh. Probably.
I guess I get restless and want to try something new. Does that happen to you?
Using GianiGranite Countertop Kits:
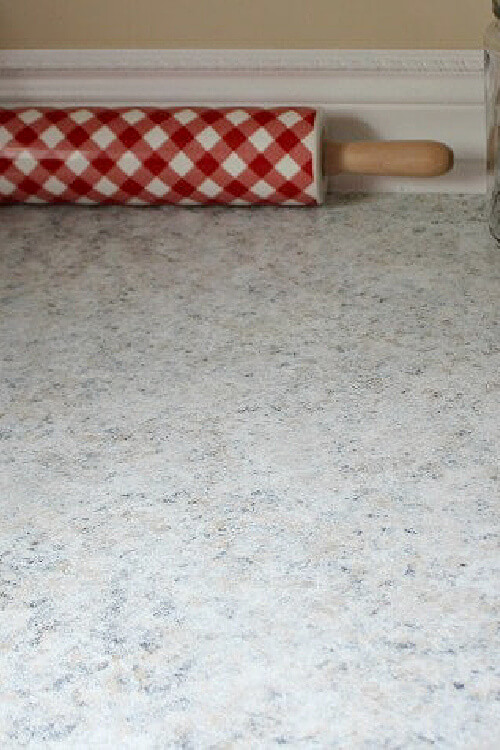
This is the GianiGranite countertop project I DIYed. I got a free product kit of my choice from GianiGranite. After all the detailed applications, which are done in stages to give it a granite-like look, you apply the topcoat.
With GianiGranite, you can order various types of styles and colors of paint.
When using the GianiGranite kit, first, you roll on black primer. Then you have three colors to sponge on with the sea sponges they send you with the kit. You keep going while it’s wet, sponging on each color. One after another.
As soon as I started applying it, I worried that the boho-style backsplash wouldn’t work with the GianiGranite paint kit.
I just didn’t like the granite look with the colorful bohemian backsplash tiles. Which led me to take down the colorful bohemian decals.
Then I went to Lowe’s to pick up paint samples and trim.
I ended up painting the backsplash wall a tan color and was more pleased with the result. A more sedate look seemed to work better, I thought.
Giving The Cabinet Doors Personality:
I headed to the stores for inspiration for the cabinet doors. Sometimes I get ideas just walking down the aisles in stores.
I walked through Michael’s to see what they had, but came up empty.
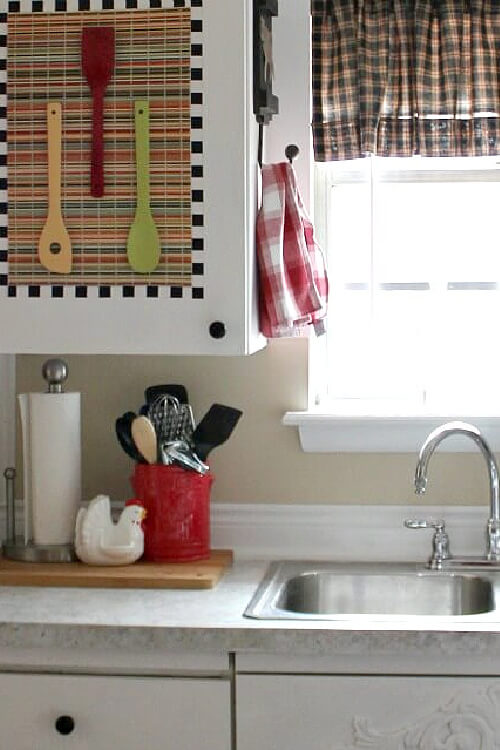
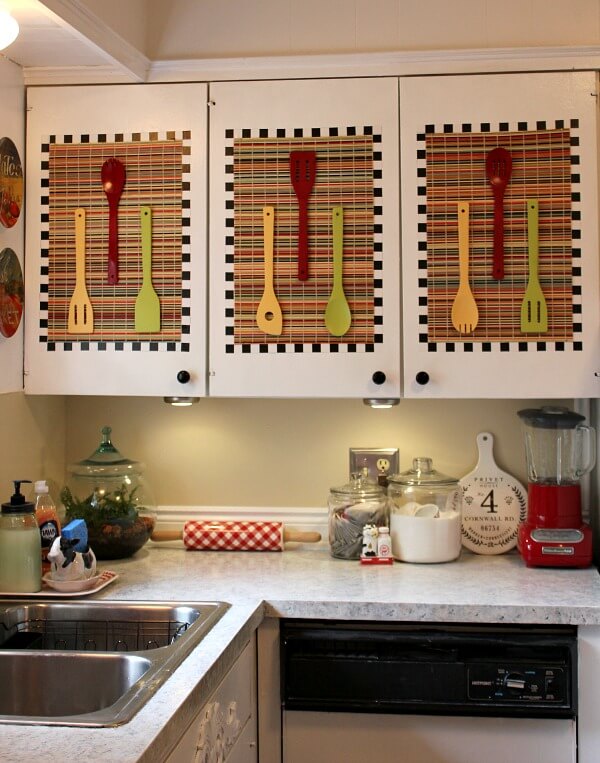
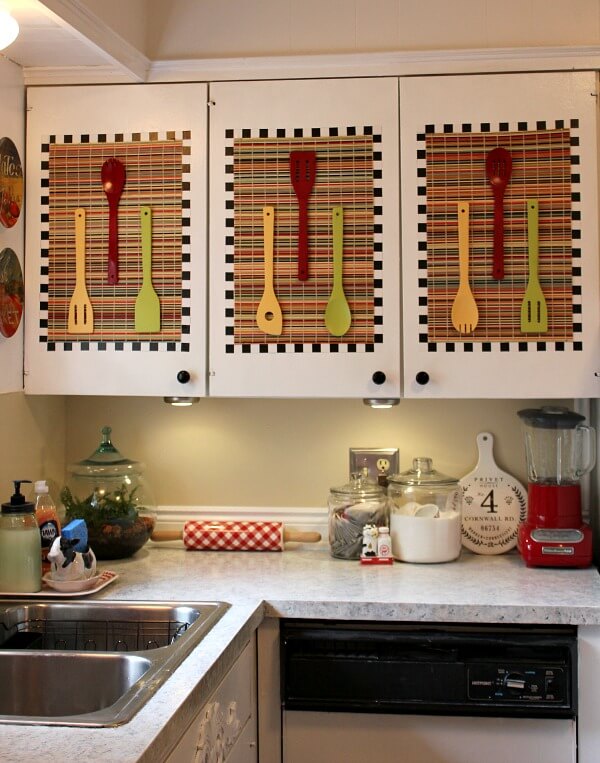
Then I strolled through the kitchen section at Bed, Bath, & Beyond. I found the colorful reed-style placemats and decided they might work on the cabinet doors.
Then I came upon bags of wooden spoons and other utensils. They were in a net bag, and I bought four bags for $5.99 each.
I ended up tacking the placemats to the middle of the cabinet doors. Then I applied strips of black-and-white checked contact paper I had from the previous kitchen redo to resemble a frame of sorts.
The place mats are simply nailed on the cabinet doors with short nails, as were the wooden spoons. They can easily be taken down if need be.
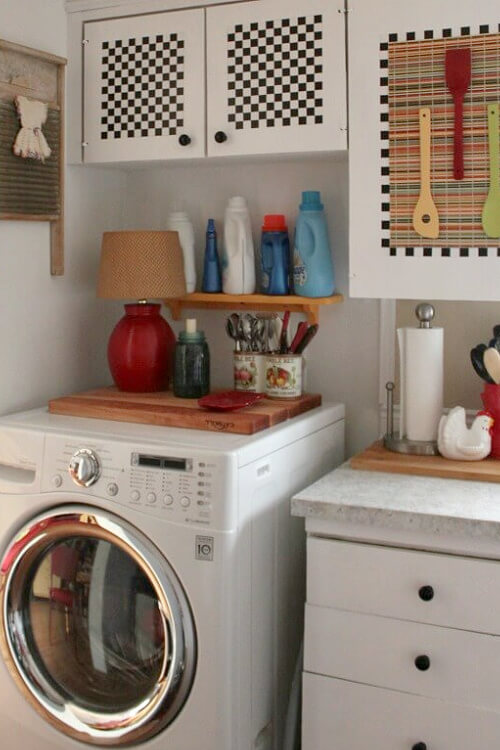
I had enough of the black-and-white contact paper left to apply to the smaller doors up above. This brought every cabinet door together, so to speak, I decided. They were too small for the larger placemats, and that would have looked too busy anyway.
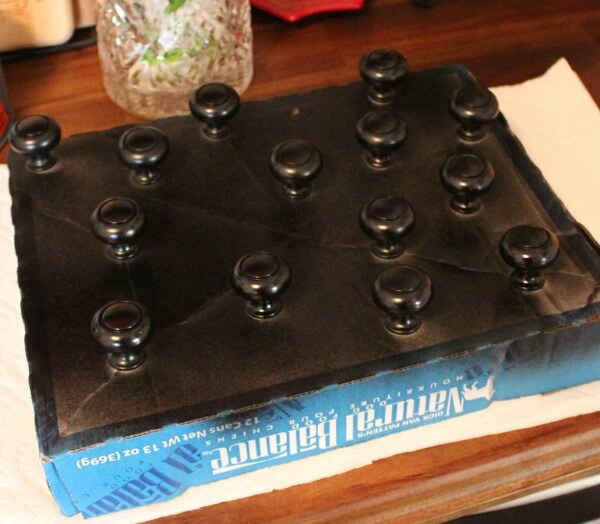
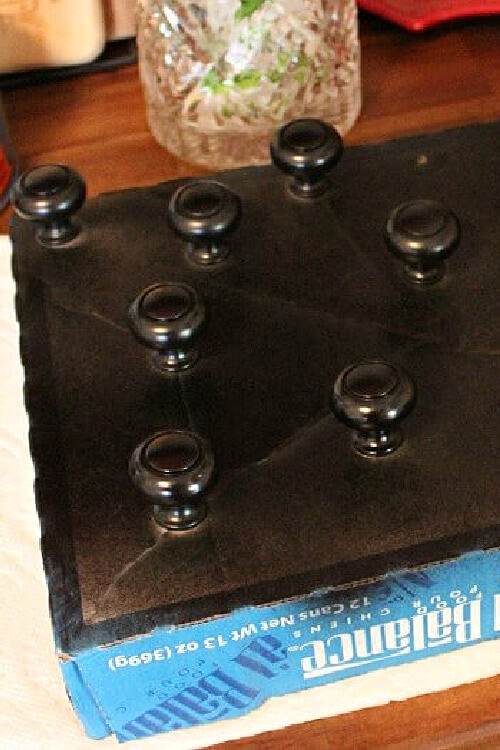
I painted the brown knobs I purchased for another kitchen renovation black. And I painted them using the trick you see above. The instructions are below.
How to Paint The Knobs Using a Cardboard Box:
First, you find a cardboard box that has room for all of the knobs. The whole point is to get all parts of the knobs painted well, and do them all at once to save time.
You poke holes in the cardboard with the knob screws. Then you hold the screws underneath while screwing the knob on from the top. And then you apply the spray paint.
Valance from a Quilt Shop:
The valance was gifted to me by an online quilt shop. The fabric is good quality, and I love that the valance is lined, because the hot sun comes through this window in the afternoon.
The lined fabric will help keep the heat out during the summer months.
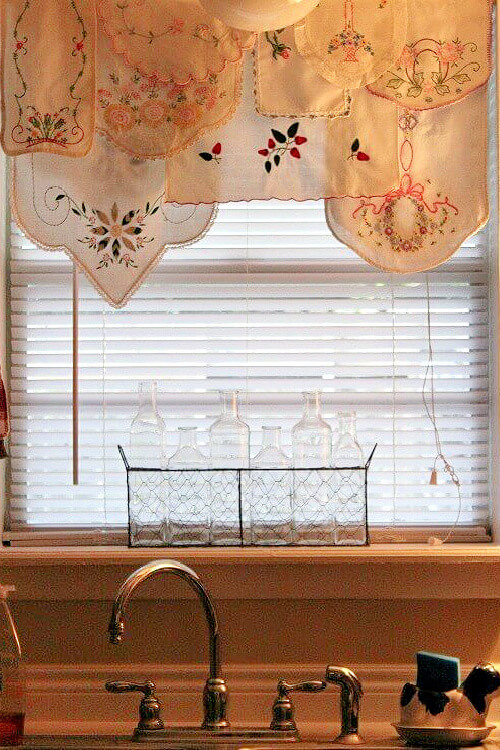
So the layers of vintage linens I had across the curtain rod were taken down to make room for this valance.
Coffee Bar on Opposite Wall:
This is my little coffee bar arranged on the World Market Wooden cart I ordered.
I found the red cupboard, already painted red, at the antique mall and hung it on the wall. This gave me more storage space, which is always a good thing in a kitchen.
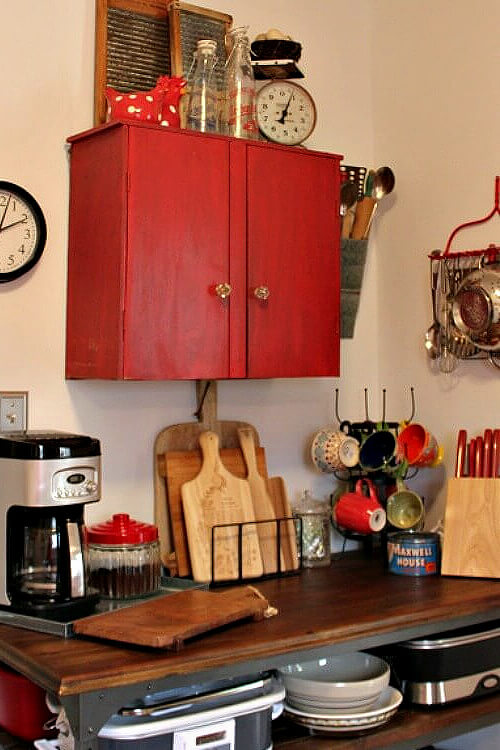
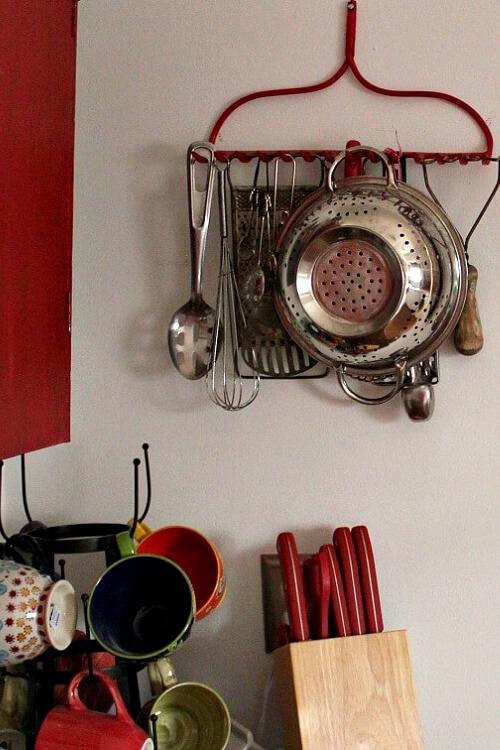
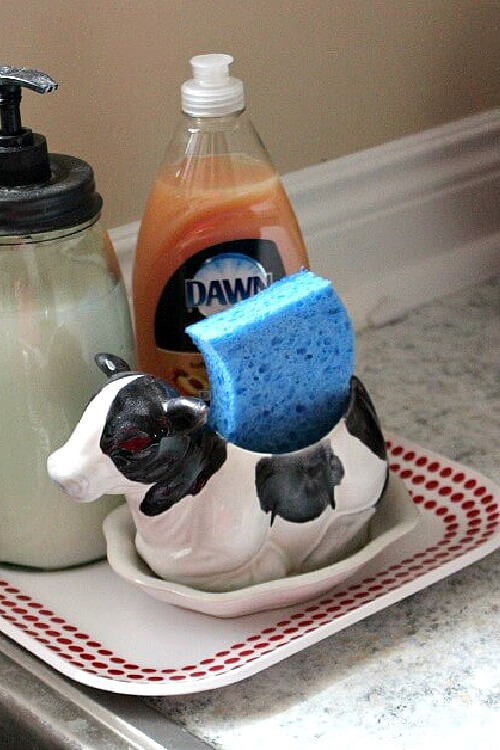
I’m using a little cow planter I found at the thrift store to hold my kitchen sponge. The rake is painted red and hung on the wall for vertical storage.
So that is the completed kitchen redo. Number 3. I believe that I’m done for a while!
I decided that my instincts about the backsplash decals were correct. The tan paint job looks much better. Less busy, which was the point.
So there you have it. It may not be everyone’s cup of tea. But I like things to be a little unique.



I missed the initial reveal. You did an awesome job Brenda and I think you chose the perfect color. The bamboo was clever on the cabinets. You are like me, color, texture, layers…gotta have them!
I love it!
Brenda,
OMG!!!! Totally in LOVE wiht your Kitchen Re- Do!! You know that I am a lover of color and especially red in the Kitchen was warms my heart!! The place mats and spoons are a fantastic idea and I LOVE your counter tops!!
I love seeing what you do with your apartment because Joe and I decided that in about 10-12 years from now when our house needs another new roof, we will sell it and move into an apartment in the complex right next to us . It is the same complex where our sons live.
Congrats on your outstanding Kitchen Re-Do!! LOVE IT!!!
Hugs,
Deb
Brenda everything looks fantastic. Your so creative. I love the paint color with all of the other colors. I will feature it today at HSH!
Great Job Brenda! I do love all the color you use in your little apartment. It is so cozy. I wish I was less afraid of color. Maybe if I knew how to use it I would not be so afraid. But you have a knack for it.
I think it's just figuring out how to use it in a layered fashion. Does that make sense?
I have loved all of your kitchens and this one is wonderful also! So creative and clever! Very well done, Brenda! xo
Ah, Andrea, your kitchen is one of my favs of all time.
Brenda this is fabulous! I cannot get over how some inexpensive place-mats and wooden utensils made such a darling and dramatic difference. This post was a joy to read and I sincerely hope you will continue to share your sunshine at Thoughts of Home on Thursday.
I like to think outside the proverbial box.
Your countertops turned out beautifully, Brenda. I'm impressed! And I love your cupboard door placemat and spoon treatment. So creative, colorful, and cute. It's always fun to see what you'll come up with, and you never disappoint!
Hey, I like to see what I'll come up with. I'm usually as surprised as anyone!
Your kitchen looks so cute and so full of life, all with a bit of whimsy thanks to the amazing ideas you had!
I just couldn't leave it at the counter tops. I was spurred on to do something that would sort of have my signature on it!
Sensational!
Your kitchen looks amazing.
Kathy
Your kitchen reno turned out great! I often wonder if I should do something similar to my counterops but worry about how the painted on stuff would hold up to wear.
I've had people tell me, who have used this, that theirs has held up for years and still counting.
Wow! Your kitchen now has a more streamlined look with your painted countertops, which look like the real thing! Your cabinet doors bring in your unique style and pops of fun colors, too. I notice you have undercabinet lighting which really brightens up the space. I need to find some for our kitchen. Wonderful transformation….or should I say transformations?
Yeah, my third try here!
You are just too darn clever! I would have never thought of that cabinet treatment in a million years…the placemats would have gone on the table and the utensils would have gone in a crock. LOL You are such a wonderful source of inspiration!
I am in love with your countertops! I may have to try that on my 1960's formica countertops in both upstairs bathrooms…
Well, I had two place mats left. So those went on my little table!
The countertops turned out great! They look perfect from here 🙂
That placemat idea is great Brenda and I love the ice thing on your fridge. The whole thing is adorable! You have got such talent Brenda.